This article provides instructions for navigating and editing Assessments and Master Treatment Plans (Tx Plans) in BestNotes, covering how to access, modify, and finalize these documents.
Permissions Required
- Create Tx Plan
Navigating and Editing Assessments and Master Treatment Plans
Most Med/Clinical Documents are fully editable. Click the Save Snapshot button to save a version or specific time during a client's treatment. Each Med/Clinical document has the title "Worksheet" to prompt the user to Save a Snapshot for records.
Accessing the Master Treatment Plan Worksheet
- To create a new or edit a Master Treatment Plan for a client, navigate to their face page and click on the Med/Clinical button.
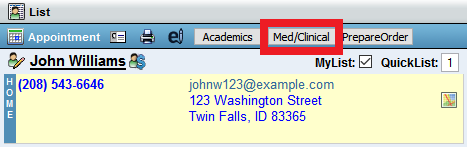
- This will open a new window that displays all of the clinical and treatment tabs. Click on the Master TX Plan tab to display the Master Treatment Plan Worksheet.

Note: The header information is pulled in automatically from the client's information previously entered.
Using the Subtitle Field for Assessments and Treatment Plan Documents
The subtitle field allows users to add an Addendum or Update Title (Portal Subject) on Assessments or Treatment Planning documents. This title will display for a Snapshot on the Client's Activity Log (chart) and Portal, which is useful for auditors to see the difference between original and updated documents.
- Assessments yellow Title field:

- Treatment Planning Documents blue Title field:

- Activity Log (chart) display:
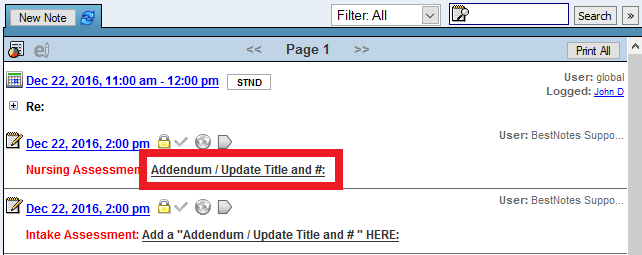
- Logs (documents) on Portal:

Understanding Field Types
There are three field types to work with throughout the worksheet:
- Date fields:These are recognized by a calendar icon.
- To fill these fields out, click on the calendar icon and select the desired date.
- Addition fields:These are recognized by a plus icon.
- These fields are populated by clicking on the plus icon and making selections within the new window.

- These fields are populated by clicking on the plus icon and making selections within the new window.
- Free text fields:These are recognized by a light green tint and dotted line outline.
- These fields are activated by clicking within the field. Once the field is activated, a few basic text styling tools at the top of the box will appear. Begin typing within the field to enter data.
Completing the Master Treatment Plan
- When the diagnostic section is complete, continue filling out the rest of the Master Treatment Plan worksheet by filling out each free text field.
- When finished with the Master Treatment Plan worksheet, scroll to the bottom of the page to view a preview of the completed Master Treatment Plan.
- Once everything is complete, click on the Save Snapshot button at the top right-hand side of the screen to lock the Master Treatment Plan, notify individuals of required signatures, and post the finished Master Treatment (Tx) Plan to the client’s activity log.
Next Steps
- For more information about diagnosing, visit www.cms.gov or ICD10data.com (Recommended).
- To learn more about permissions for diagnosing, click HERE.
- To diagnose or add a problem, click HERE.