Data Forms are used to capture static data that is not collected in the "Edit Client" screen or in the "Med/Clinical." This data can populate into documents or reports.
Permissions Required
- Manage Data Forms
Creating a New Data Form
To create a new Data Form, you will need the "Manage Data Forms" permission.
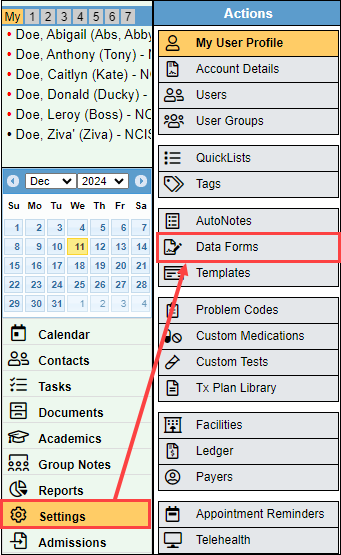
- Select "Settings" and select "Data Forms."
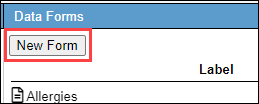
- Select "New Form."
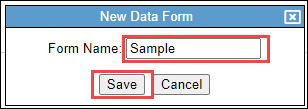
- In the "Form Name" field, enter the name of the Data Form, and select "Save."
- The "Group" drop-down will also you to restrict the users that are able to view and use the Data Form based on your User Groups. This drop-down will be empty if you have not set up User Groups.

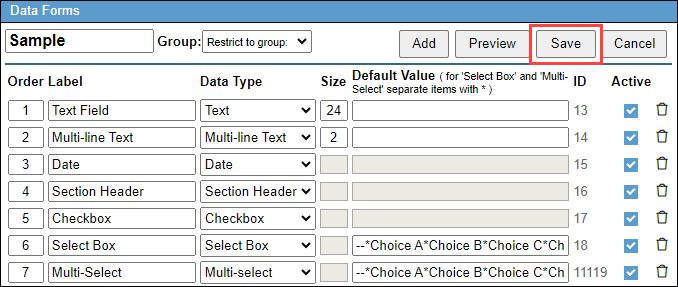
- Each Data Form will automatically have one line. Start by updating the "Label" field on the first line. This field is used to enter the question or section header.

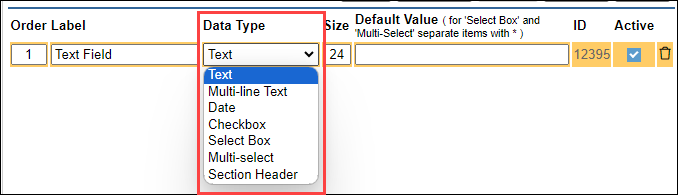
- Select the "Data Type" drop-down to define the type of field. There are 7 types of fields
- Text: Allows a single blank text field.
- Multi-Line Text: allows for a blank field with multiple lines
- Date: places a date picker in that row.
- Checkbox: places a checkbox next to the label text.
- Select Box: places a drop-down option.
- Multi-select: places a drop-down option that allows you to select more than one.
- Section Header: creates a header.
- The "Size" field will only be available for "Text" and "Multi-line Text" fields.
- Text field: will define the number of characters visible.
- Multi-line Text: will define the number of lines displayed.

- The "Default Value" field is where you can specify default text that will appear, or where you define your section options. This field is only available for, "Text", "Multi-line Text", "Select Box", and "Multi-select" data types.
- Text and Multi-line Text field: the default value will display on all contacts that use the Data Form.

- Select Box and Multi-select: The default value is where you enter your drop-down options. Start the default value with "--*", then enter each option with an * between each option. For example, "--*Choice A*Choice B*Choice C."

- Text and Multi-line Text field: the default value will display on all contacts that use the Data Form.
- Select "Add" to add any additional lines to the Data Form.

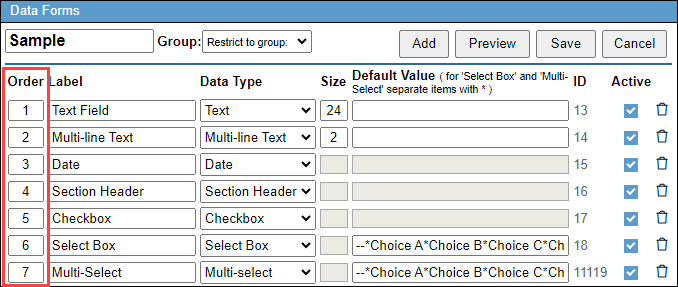
- Identify the "Order" number. This will designate the order in which the fields will appear.
- Once you have all of the fields entered, select "Save."