This article explains how to manage individual user calendar settings, including updating calendar labels and restricting appointment types.
Permissions Required
- Manage Users
Manage User Calendar Settings
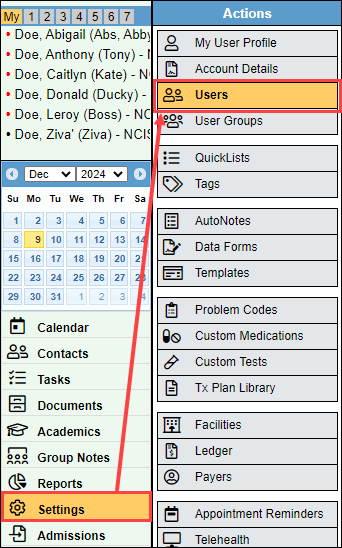
- Navigate to "Settings" and "Users."
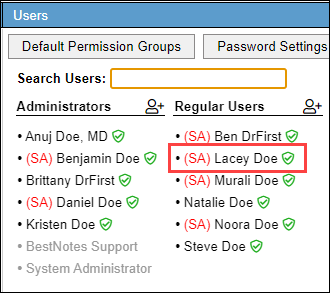
- Select the desired user.
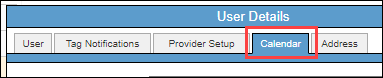
- Select the "Calendar" tab.
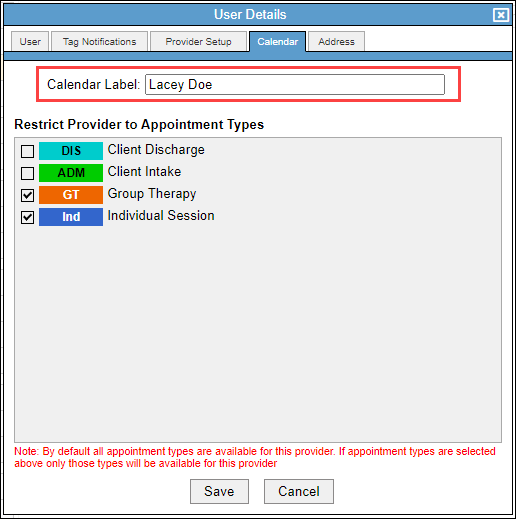
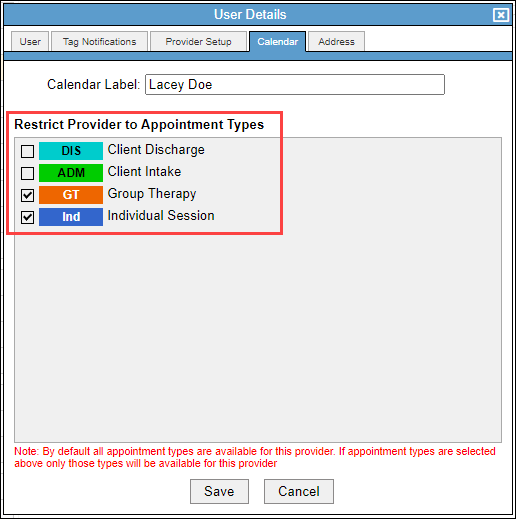
- The "Calendar Label" field will update the users name when viewing their calendar. By default, the users name will appear as first name last initial. If you have two users with the same first name and last initial, you can update this label to differentiate between those users.
- To view this change, select that users calendar. If it is your own calendar, select another users calendar. You will then see the updated Calendar Label.

- In the "Restrict Provider to Appointment Types" section, if no appointment types are selected, the user can use all of the appointment types. To restrict a user to only specific appointment types, select the checkbox next to the appointment types you want the user to have access to.
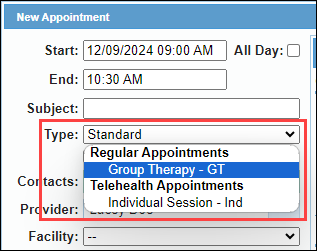
- This will appear in the appointment "Type."
- Once you have made your adjustments, select "Save."
