This article provides step-by-step instructions on how to download and install the BestNotes application on a Windows computer, allowing you to connect to the BestNotes web application.
Permissions Required
No specific BestNotes permissions are required.
Installing BestNotes on Windows
To connect to the BestNotes server, you must first download and install the BestNotes application. You can find the download link here: BestNotes Downloads
Note: If you are using multiple applications, this version does not support that, and your multiple applications will be removed upon download. For accessing multiple accounts after setup, see the Login with multiple Site IDs article.
- BestNotes will automatically download. If the downloads folder doesn't open automatically, select the download arrow at the top right of your browser window and select the "BestNotes Setup."
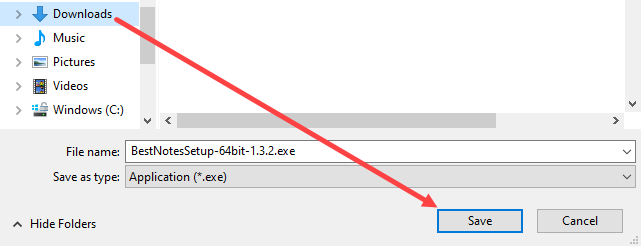
- Save the file to your "Downloads" folder.

- Select "Open" once the download has completed.
- Select "Yes" to allow the app to make changes to your device.
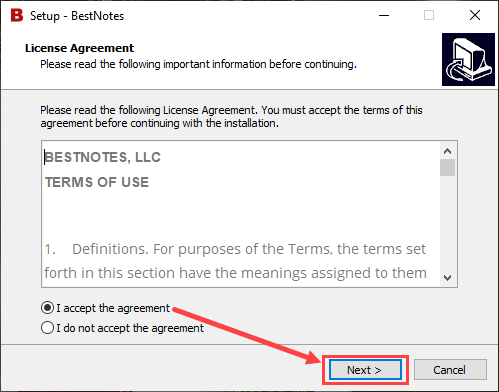
- Review the "Terms of Use."
- Choose "I accept the agreement" then select "Next."
- Choose to create a desktop shortcut (recommended) and select "Next."

- Select "Install."

- Choose whether to launch BestNotes immediately and select "Finish" to complete the setup wizard.

You are now ready to use BestNotes.
Next Steps
- See also: Login with multiple Site IDs