This article explains how System Administrators can enforce, manage, and disable 2-Factor Authentication (2FA) for all users within BestNotes.
Permissions Required
- System Administrator
Enforcing and Managing 2-Factor Authentication
Enforced Email Verification and 2FA Setup
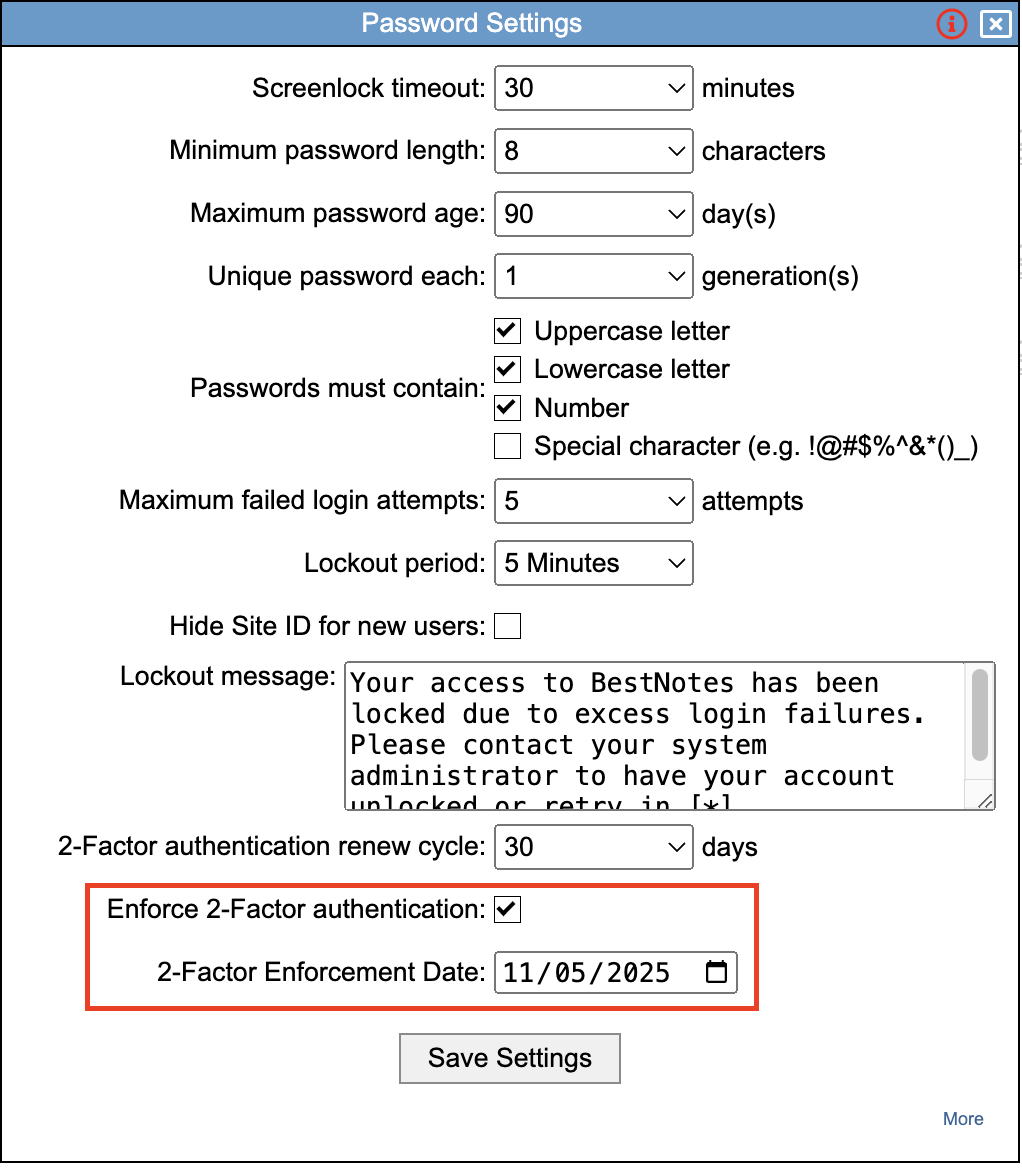
To bolster security and account integrity across our platform, System Administrators can now enforce a unified deadline for all users to verify their email addresses and complete their 2FA setup.
- Prioritized Email Verification: When an "Enforce 2FA" policy is active with a future deadline, users with unverified emails will first be prompted with an "Email Verification Required" screen upon login. They will have a "Verify Later" bypass link available until the deadline passes.
- Sequential 2FA Setup Prompt: After email verification (or if the email is already verified), users who have not yet set up 2FA will be presented with the "Setup 2FA" wizard. Similar to email verification, a "Setup Later" bypass link will be available until the policy deadline.
- Mandatory Enforcement Post-Deadline: Once the "Enforce 2FA" policy deadline has passed, the "Verify Later" and "Setup Later" bypass links will no longer be visible. Users will be blocked from proceeding until both their email is verified and their 2FA setup is complete, ensuring full compliance.
- Seamless Login for Compliant Users: Users who have already verified their email and completed their 2FA setup will bypass both verification and setup screens, proceeding directly to the normal 2FA code entry prompt for a streamlined login experience.
This can be accessed via Users > Password Settings:
If necessary, the System Administrator can click on the "More" link at the bottom of the Password Settings box to force a password reset for all users in the system.
Viewing and Managing User 2FA Status
To view and manage a user's 2FA status, follow the steps below:
- Navigate to "Settings" and "Users."
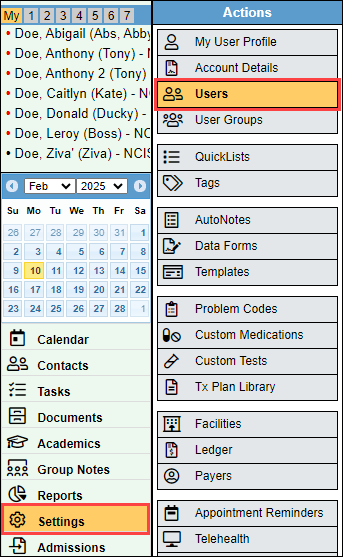
- From your list of users, any users with the person/padlock icon have enabled 2FA.
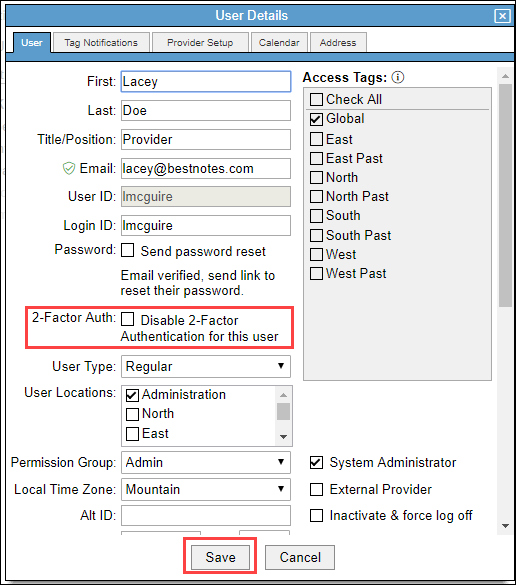
- Clicking the user's name will open the User Details box to change status.

- To disable 2FA, select the "2-Factor Auth" checkbox, and select "Save."
Next Steps
- Enable 2-Factor Authentication
- Disable 2-Factor Authentication
- Login with 2-Factor Authentication
- 2-Factor Authentication FAQs