This article provides a comprehensive guide on performing the new client intake process in BestNotes, covering how to add a new client, schedule their first appointment, complete necessary assessments, add signers to documents, and set up the client PIN for digital signatures.
Permissions Required
No specific BestNotes permissions are required.
Visual Tutorial
For quick navigation within the video, use the timestamps below:
- 00:13 Adding a new client
- 01:25 Schedule an Intake appointment
- 2:52 Begin an Intake appointment
- 3:40 Review and add signers to intake documents
- 4:48 Client Signature and PIN
Managing the New Client Intake Process
Adding a new client
- Navigate to the search bar in the top left corner.
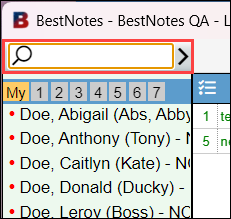
- Begin typing the client's last name. Verify the client does not already have a chart.
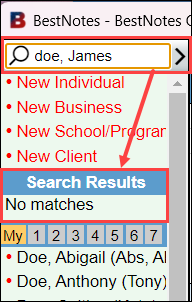
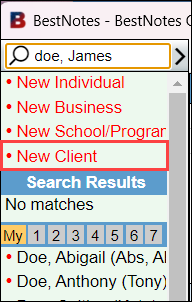
- Select "New Client."
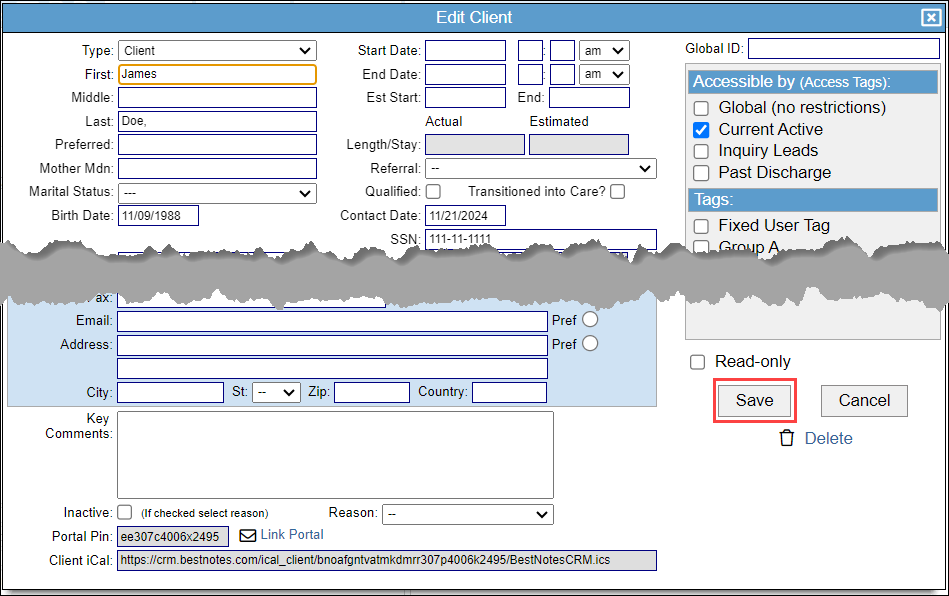
- In the "New Client" window, enter the client's demographic and contact information.
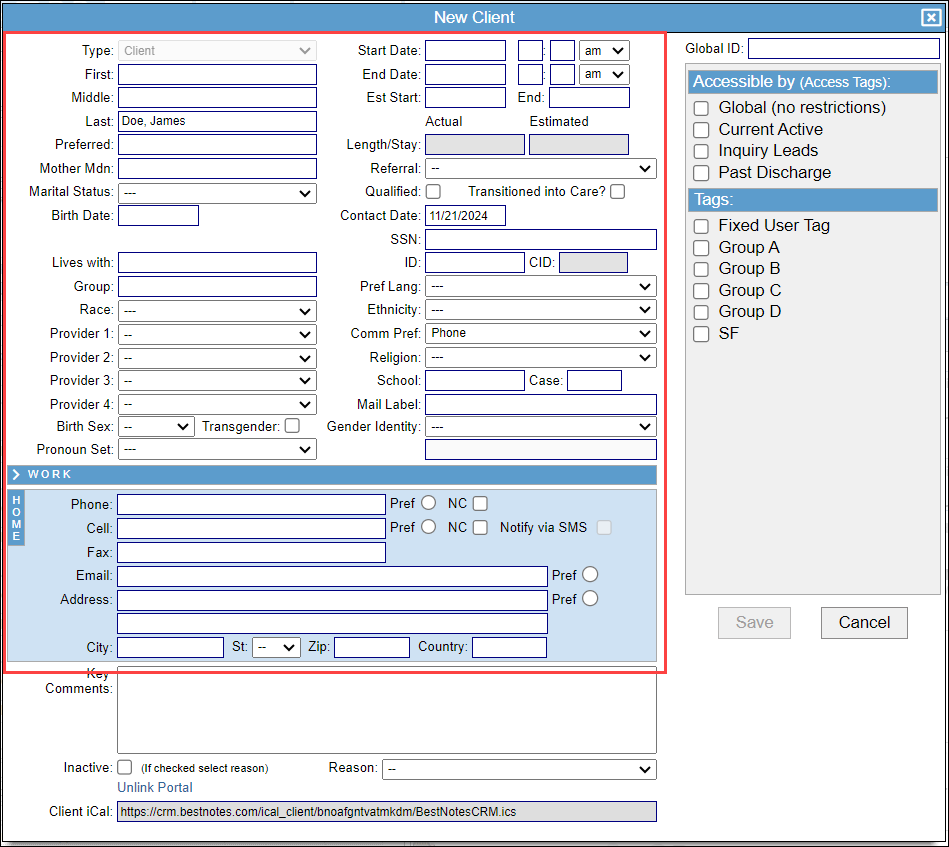
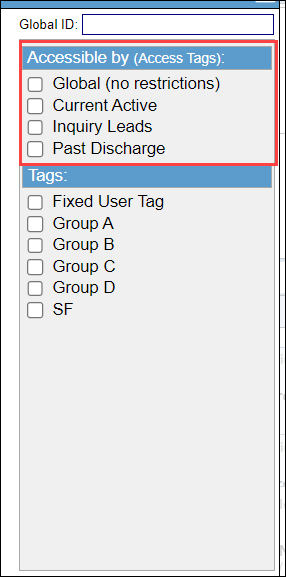
- Next, assign an "Accessible by" tag. These tags regulate user access to specific client information based on their status.
- Current Active tag - intended for current active clients who have a start date.
- Inquiry Leads - intended for any potential clients or clients who haven't received an official start date.
- Past Discharged - intended for clients who have discharged from the program.
- Select "Save."
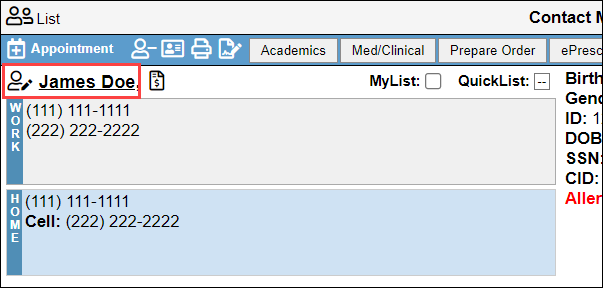
Your client chart has now been created. You can modify client demographics and contact information by selecting the client's name and updating the information.
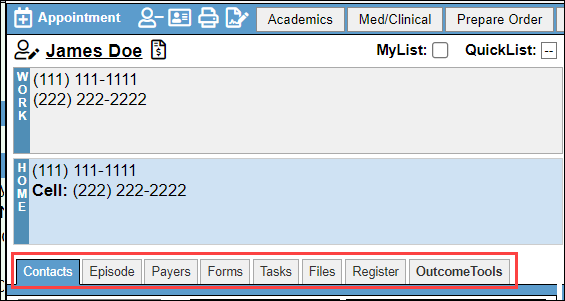
You can also add additional information in the client's chart suchs as related contacts, programs, levels of care, insurance payer details, and external documents.
Schedule an Intake Appointment
You can now schedule your new client for their Intake Appointment.
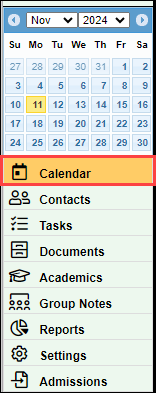
- Select "Calendar" from the lower left menu.
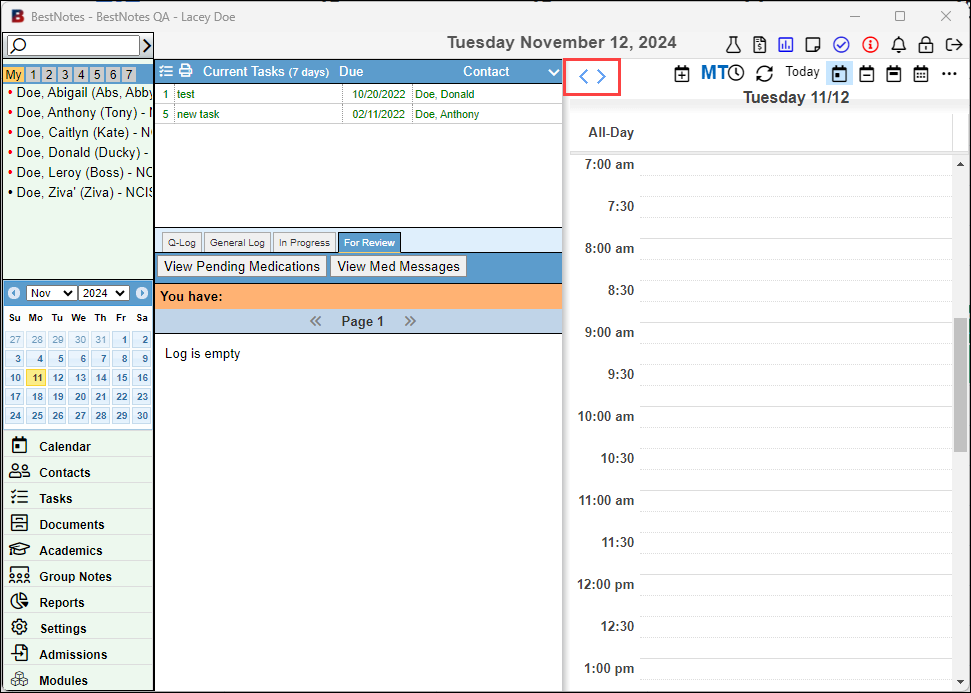
- Navigate to the appointment date by:
- Using the navigation arrows at the top to find the desired date;
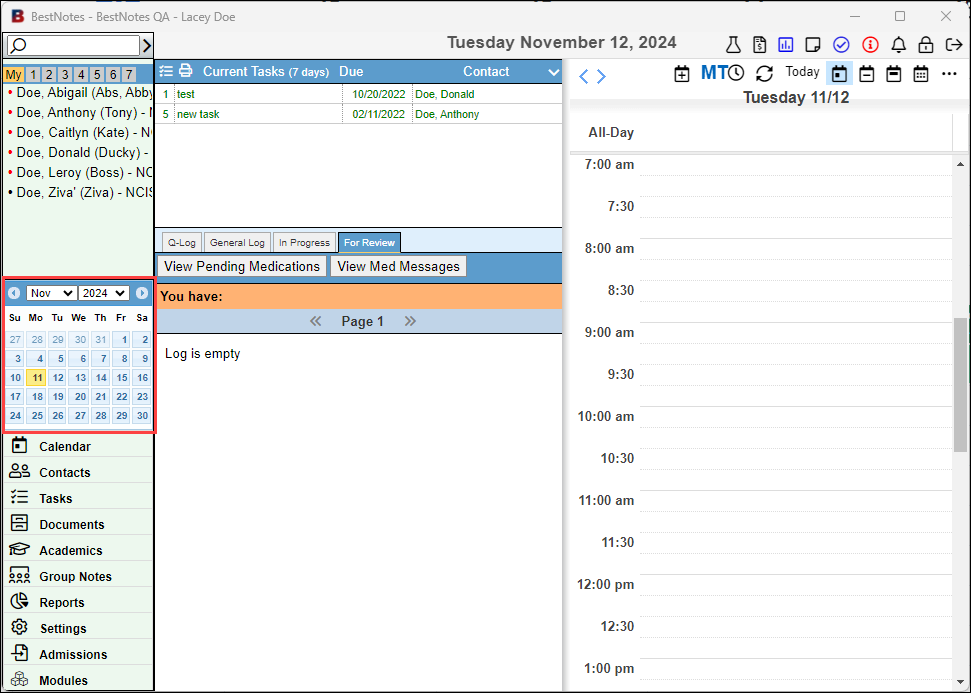
- Selecting the date from the calendar on the left hand side.
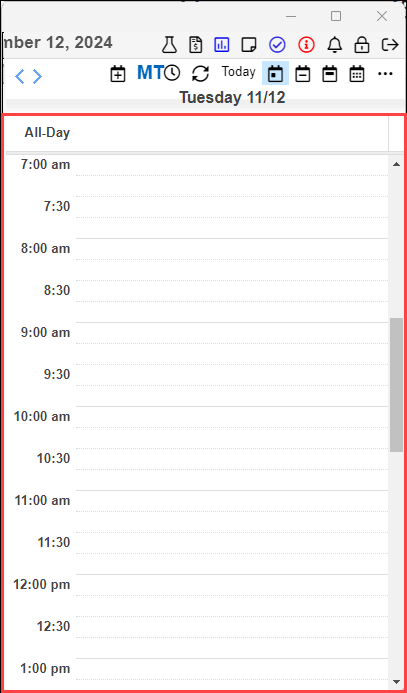
- Once the date is displayed on the right hand side, select the desired start time.
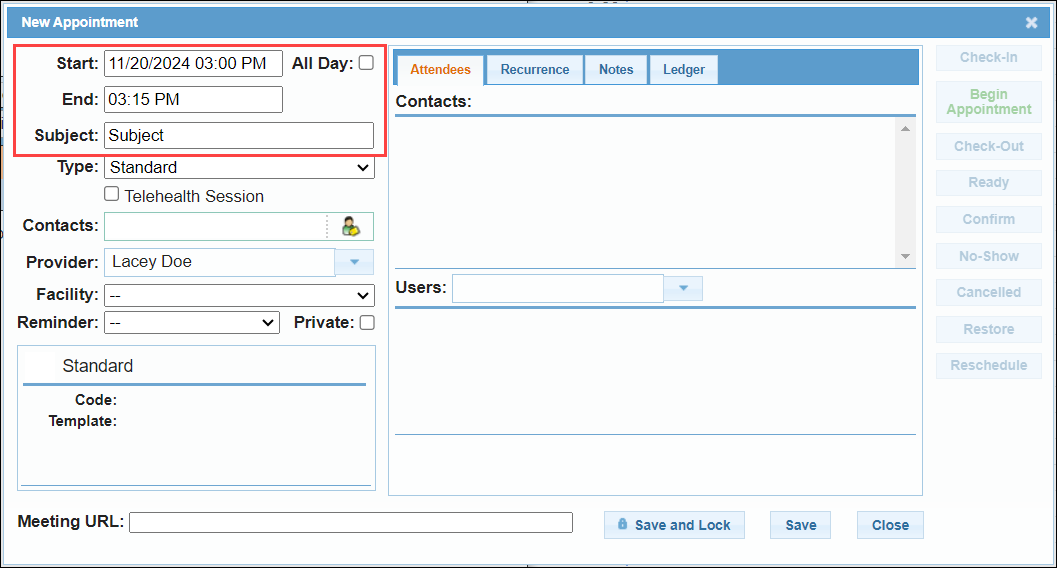
- When your appointment window opens, verify the "Start" and "End" fields have the correct date and time. Enter a "Subject." This can been seen by others, and should not include any PHI.
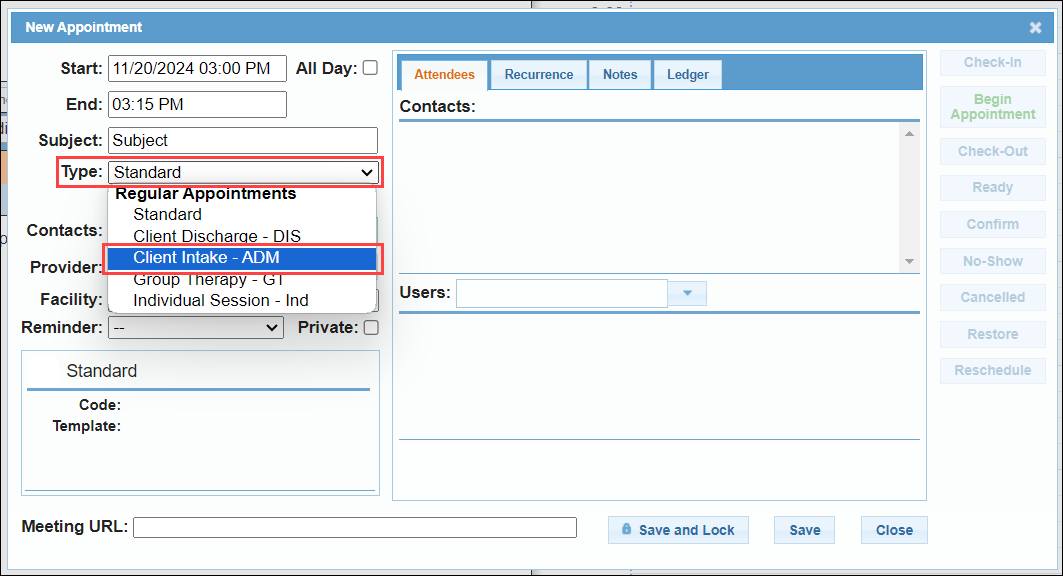
- Select the "Type" drop-down to select the appropriate appointment type. For an "Intake" appointment, you would choose the "Client Intake" appointment type.
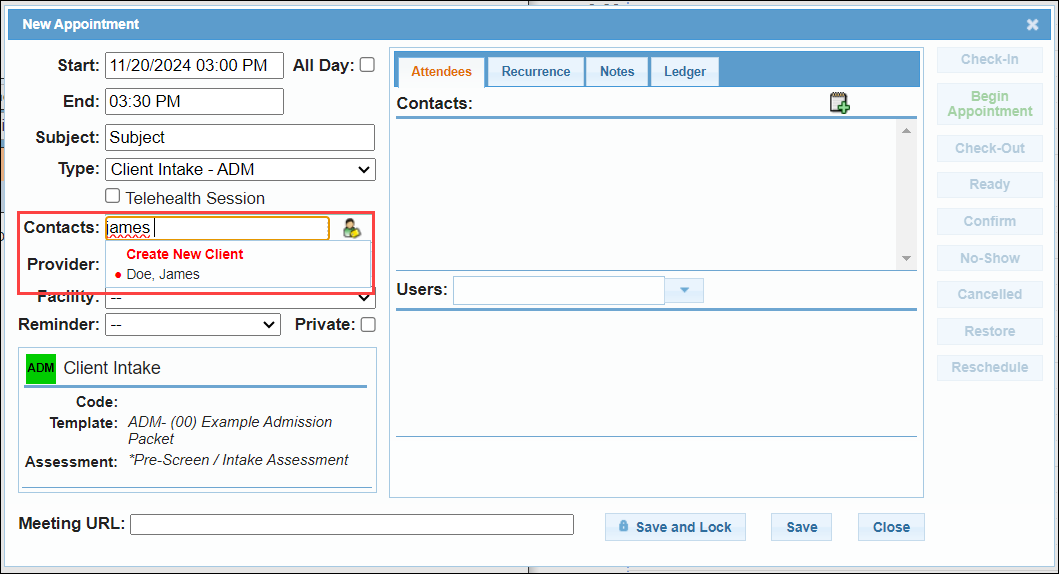
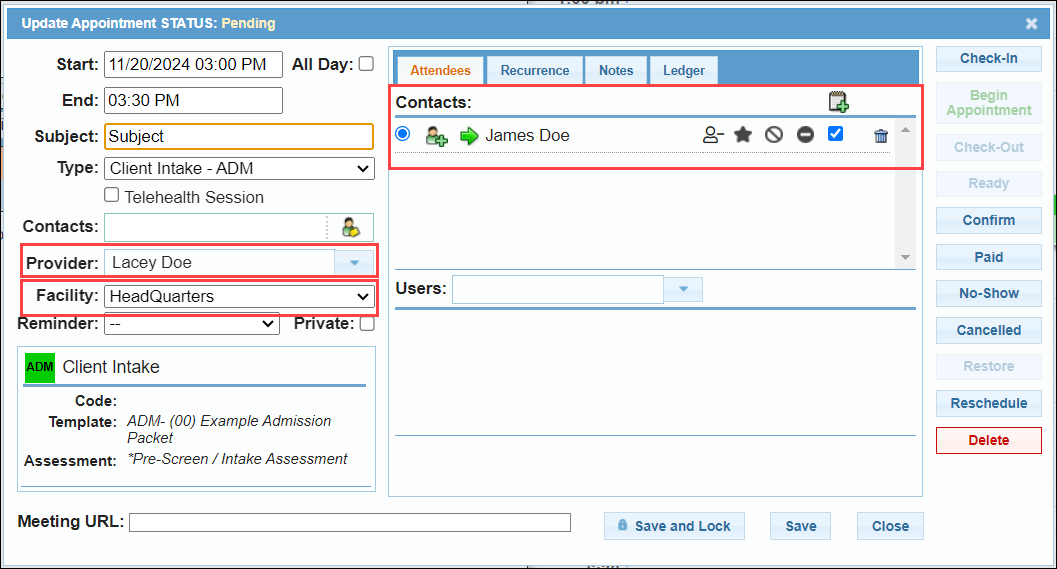
- In the "Contacts" field, enter the contact's first or last name. Possible matches will appear, select the appropriate contact from the list.
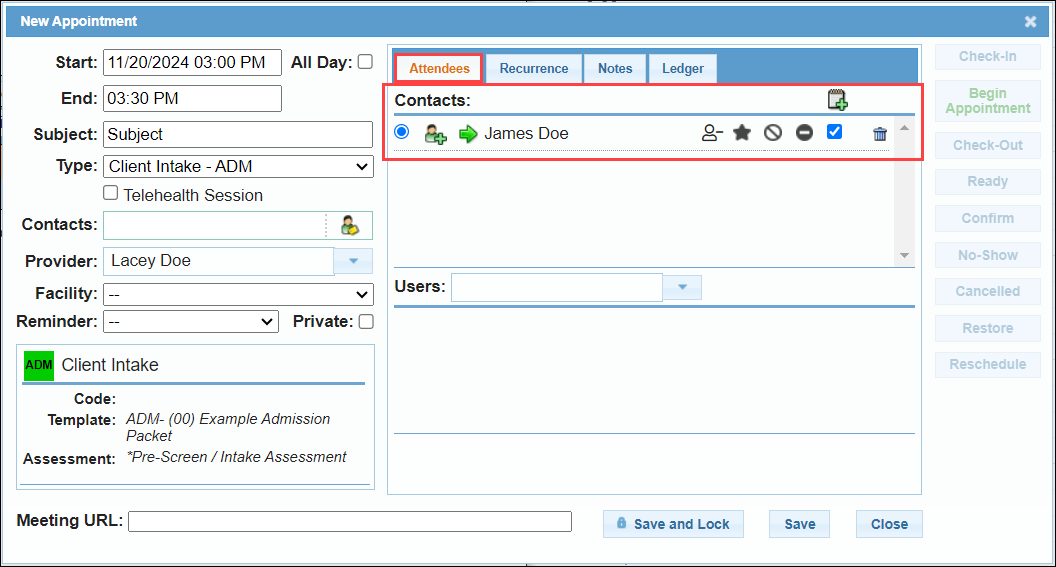
- This will add the contact to the "Attendees" tab below the "Contacts" label.
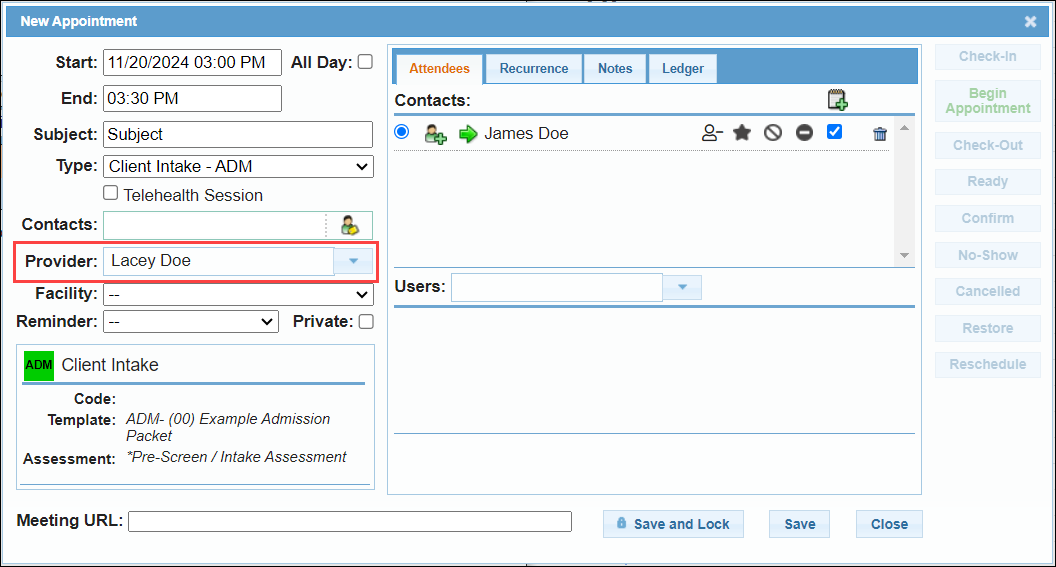
- The "Provider" field will default to the user that is logged in. With the appropriate permissions, you can choose a different user if needed.
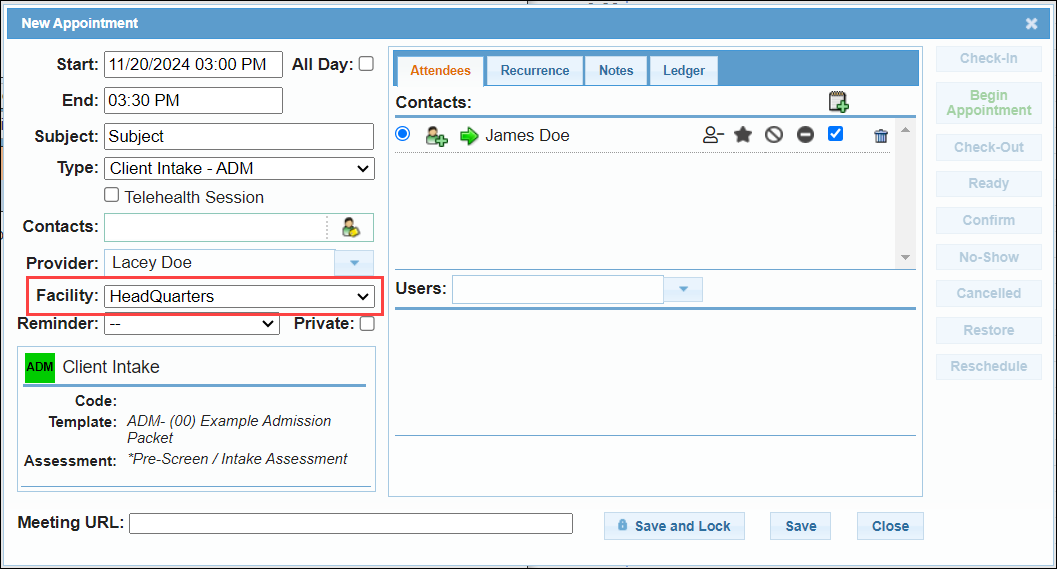
- Verify the "Facility" field is correct. If not, select the appropriate facility from the drop-down.
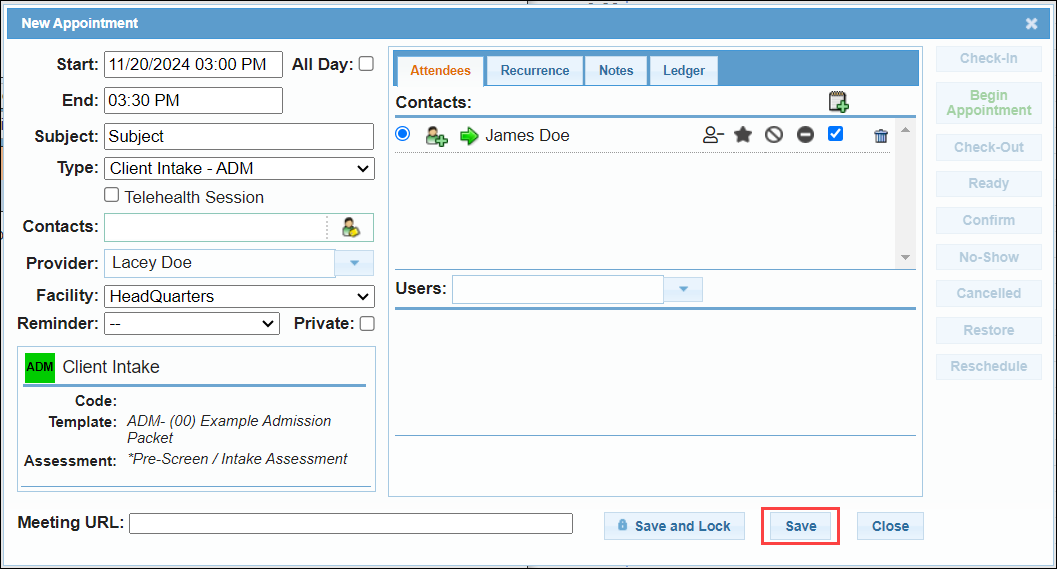
- Once you have entered all of the appropriate information, select "Save."
Begin an Intake Appointment
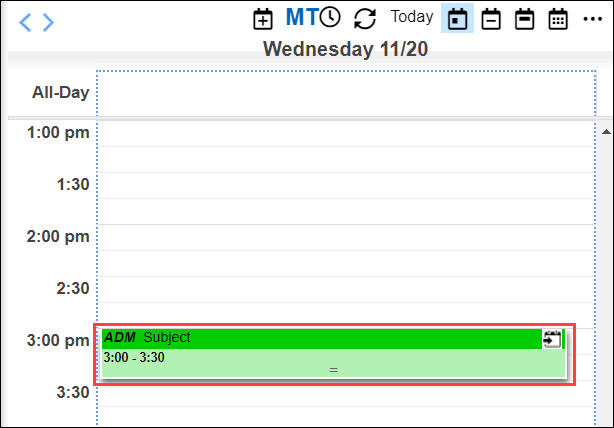
- Left-click on the appointment to open the appointment details window.
- Verify the "Contacts","Provider", and "Facility."
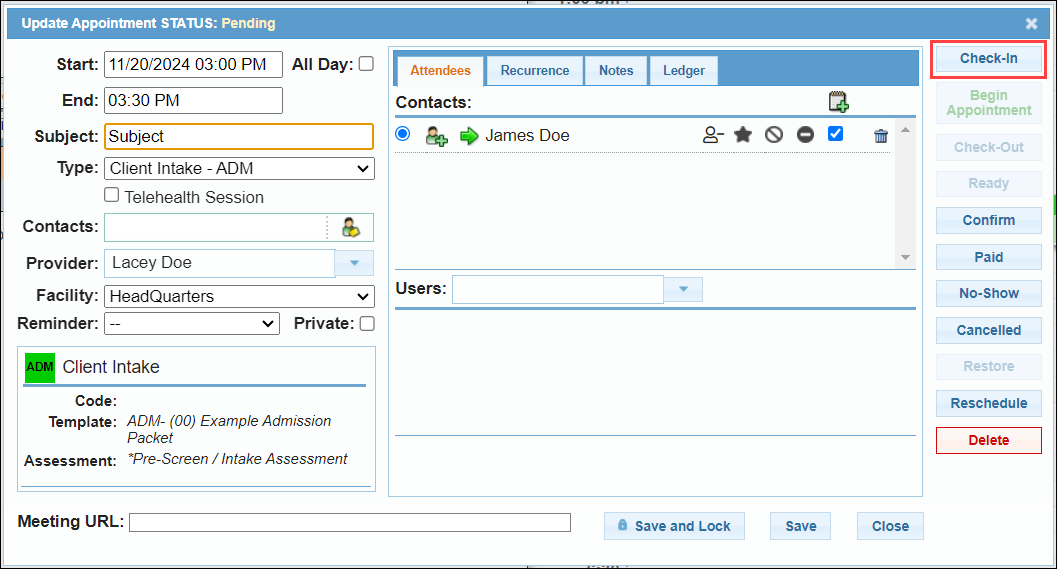
- To begin the appointment select "Check-In."
- When the appointment is checked in, documents linked to that appointment type will automatically open. This will allow you to work through the documents during the appointment.
| Note: If you are not the provider of the appointment, the documents will not open when selecting "Check-In", but will open when the Provider select "Begin Appointment." |
- The documents associated with the standard "Client Intake" appointment type include an "Example Admissions Packet" and the "*Pre-Screen / Intake Assessment." To have your company's Admission Packet added to your BestNotes, send your packet to submit a support ticket, and our support or implementation team will create that Admissions packet for you. The "*Pre-Screen / Intake Assessment" is part of the BestNotes documentation profile set.
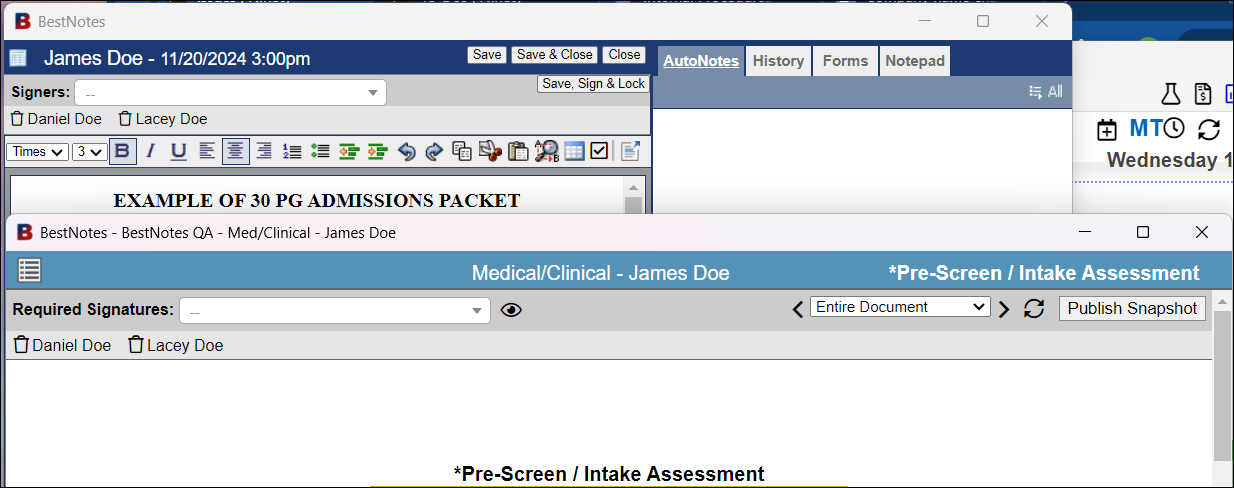
Once you have finished filling out these documents, you will want to be sure you are reviewing who is added as a signer.
Review and add signers to Intake documents
Adding signatures is important on every document that is completed within BestNotes.
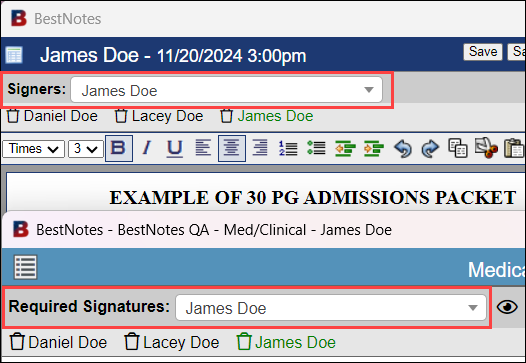
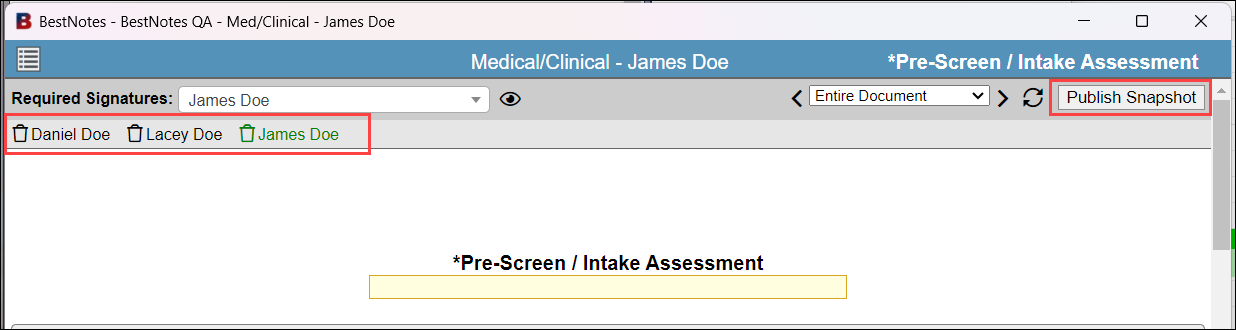
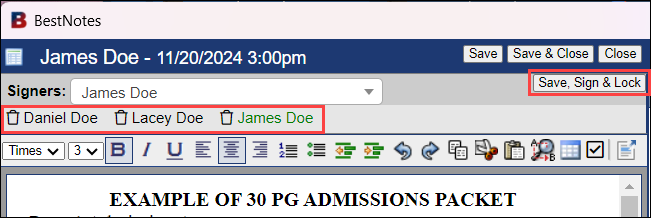
- The signatures will always be located at the top left-hand corner of your document. The signers that have been added will be listed on the lighter gray line.
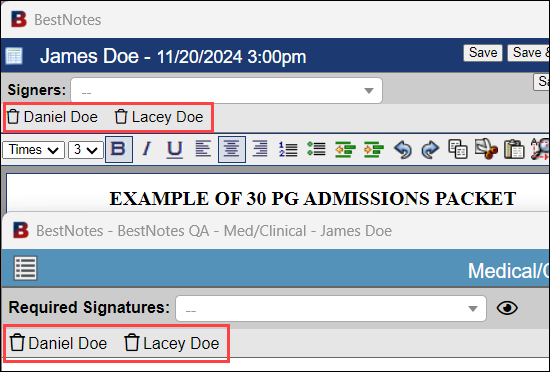
- To add the client or a supervising provider as a signer, select the "Signers" or "Required Signatures" drop-down, and select the appropriate signers.
- When working on an Assessment or Treatment Plan, once your signers have been added, select "Publish Snapshot."
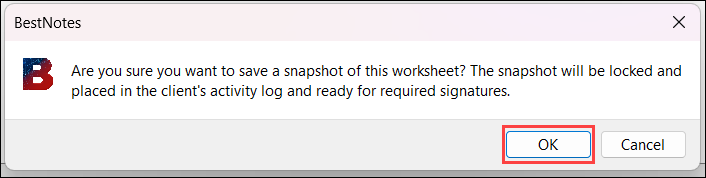
- The first prompt will alert you that you are adding this document to the client's Activity Log. Select "OK."
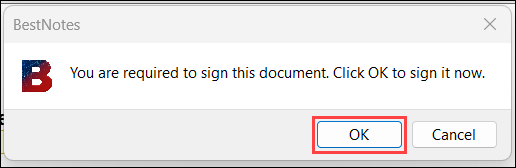
- The second prompt let you know that your signature is required. Select "OK" to add your digital signature to the document.
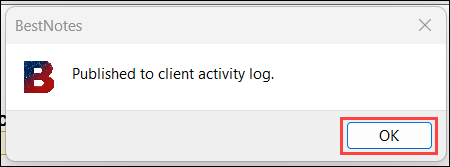
- You will then receive an alert that lets you know that the document was added to the client's Activity Log.
- When working with templates, once your signers have been added, select "Save, Sign and Lock." This is the equivalent of the "Publish Snapshot" and will lock the document add your electronic signature, and add the document to the client's Activity Log.
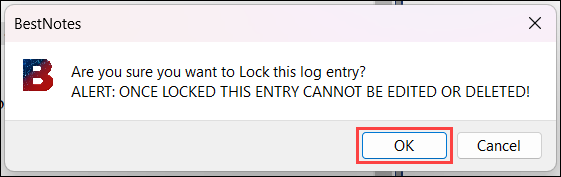
- You will receive an alert that lets you know that this will lock the log entry, which means that you will no longer be able to edit or delete the document. Select "OK."
- Once an item has been added to the Activity Log, the client will have the "Signature Required" button.
Client Signature and PIN
You can capture the client's signature as soon as the documents are added to the Activity Log.
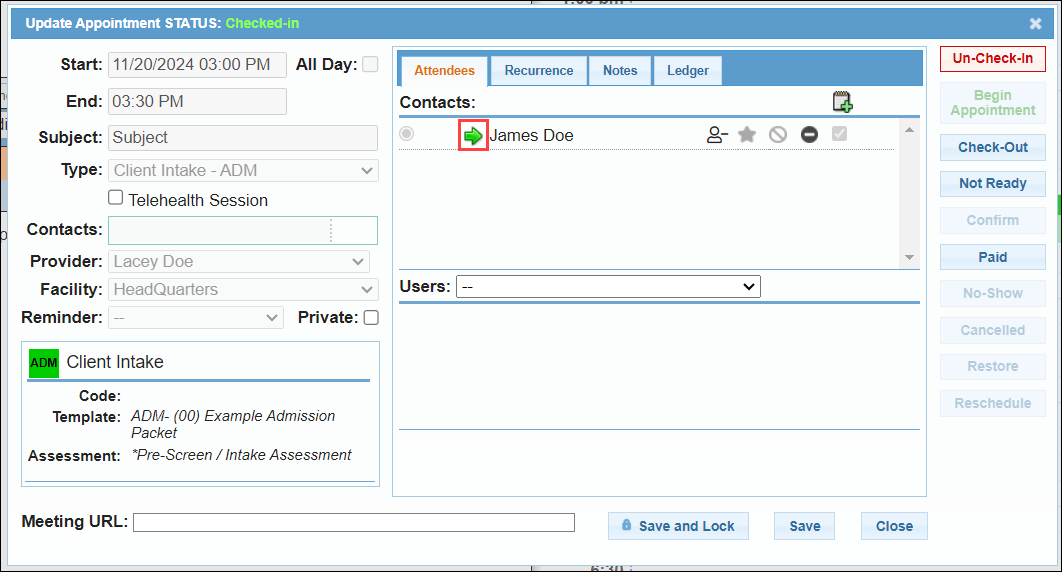
- Navigate to the client's chart by left-licking the appointment, and then selecting the green arrow in from the client's name.
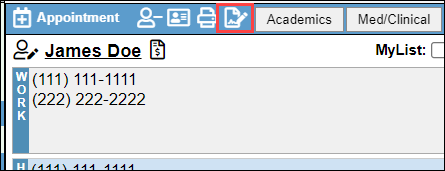
- If your client has not set up their four digit PIN, or has forgotten their PIN, navigate to the top of the client's chart, and select the piece of paper with a pencil icon to create or reset their PIN.
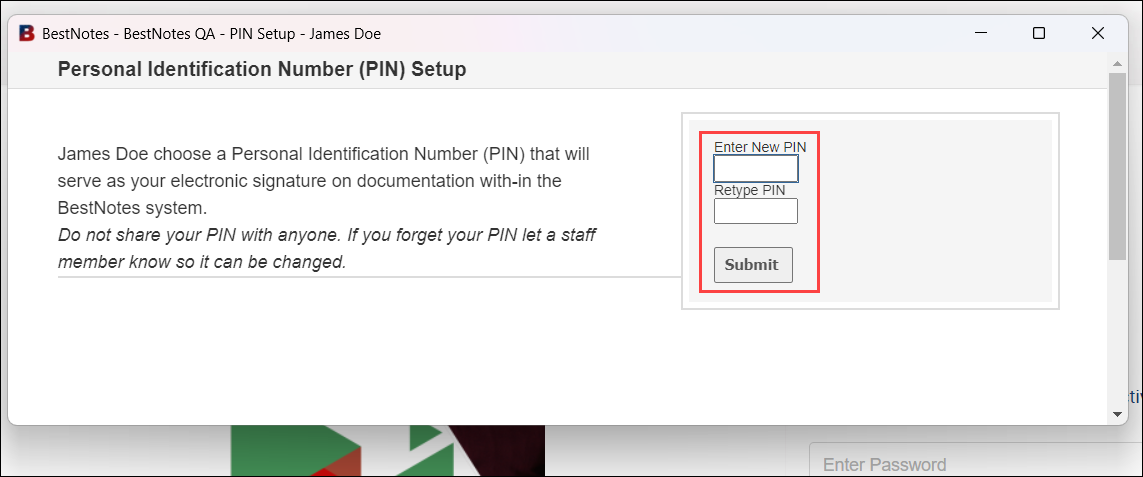
- This will lock the main screen, so you can allow the client to enter their PIN without sharing any Protected Health Information. The client should be the only one that knows their PIN, and must enter it in themselves. They will enter their PIN number twice, and select "Submit."
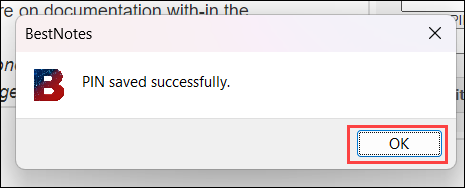
- You will see a message that states, "PIN saved successfully." Select "OK."
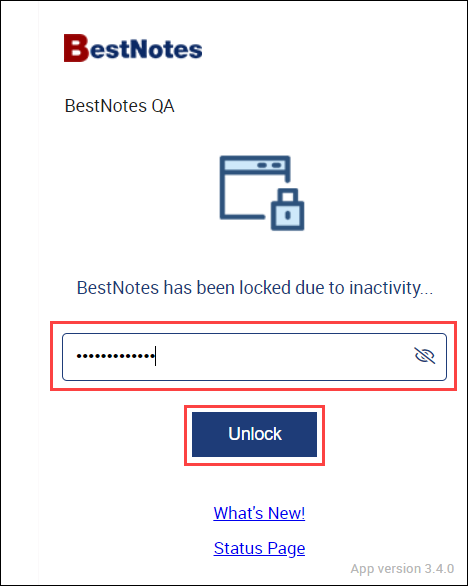
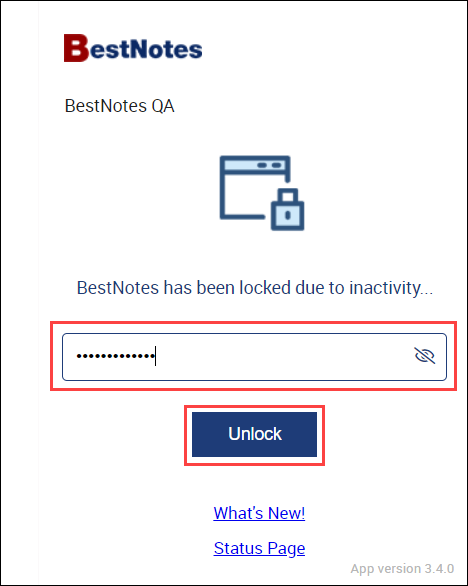
- You will then unlock your BestNotes, enter your password, and select "Unlock."
- Once the client's signature PIN has been created, you can locate the documents that require a signature, and select the "Signature Required" button.
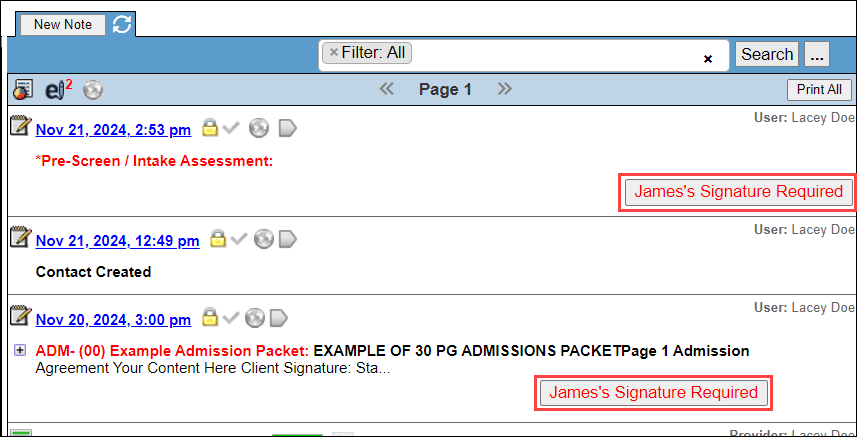
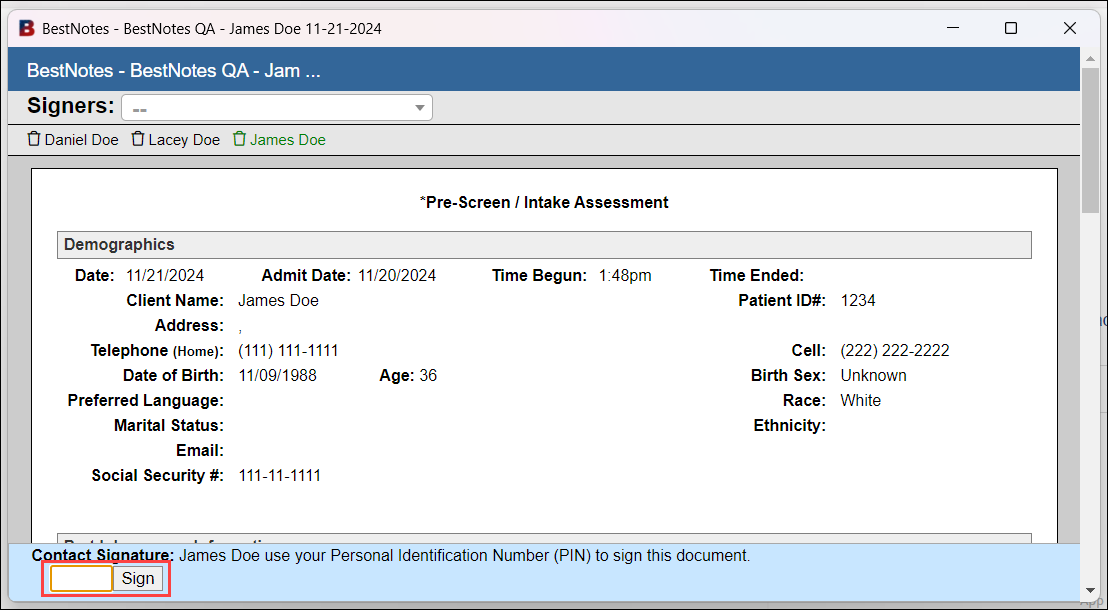
- The BestNotes main screen will lock again, and the document will open in a new window. The client can now review the document, and in the bottom left-hand corner, they can enter their four digit PIN, and select "Sign.
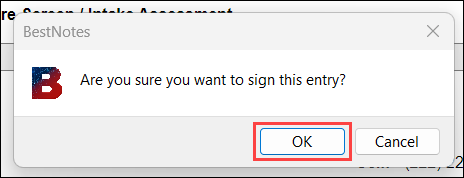
- An alert will appear asking if you (the client) are sure you want to sign this entry. Select "OK."
- You will unlock your BestNotes, enter your password, and select "Unlock."
- Repeat these steps for each document that requires a signature.
You have now successfully created a client's chart, created an Intake Appointment, added signers to the documents, and had your client sign those documents.
Back to top of page