This article outlines the process for creating a new user account in BestNotes and guiding the user through the account activation steps.
Permissions Required
- Manage Users
Creating and Activating a New User
Before creating a new user in BestNotes, ensure their email is active and ready for use. To create a new user, you need the "Manage Users" permission. If you do not have this permission, contact your on-site System Administrator.
Creating a New User
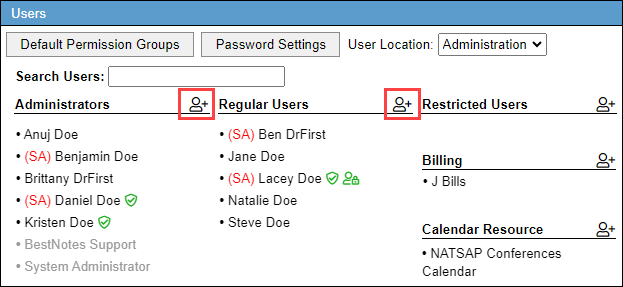
- Navigate to "Settings", then "Users."

- Select the "Add User" icon next to the appropriate user type.
- Enter the user details such as name, User ID, and email. A User ID cannot be changed once it has been created. It is recommended to use all lowercase letters, and to use the first initial and last name (e.g., jdoe).
Caution: Make sure that the email entered is active, and the user can access it.

- Select "User Type," "Permission group," "Time Zone," "Provider Type," and assign necessary permissions.
- If you are currently a System Administrator and you are creating a new System Administrator, you will need check the "System Administrator" checkbox.
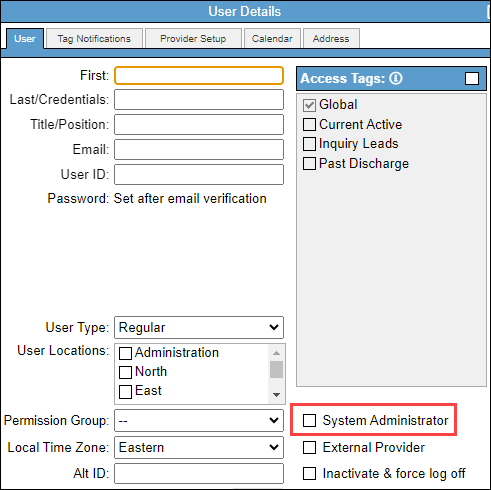
- Select "Save." This will send a BestNotes Account Creation email to the email listed.

Activating the New User
The following steps are intended to be completed by the User. It is recommended that you (as the user) access your email on a desktop/laptop computer. Using the Apple Mail app or Safari will return a 404 error, and will not allow you to move forward. It is recommended that you access this using the Google Chrome browser.
- Check your email for the "BestNotes Account Creation" email.
Note: If you do not see this email, check your spam/junk folder. - Select the "One Time Login" email and select the provided link.
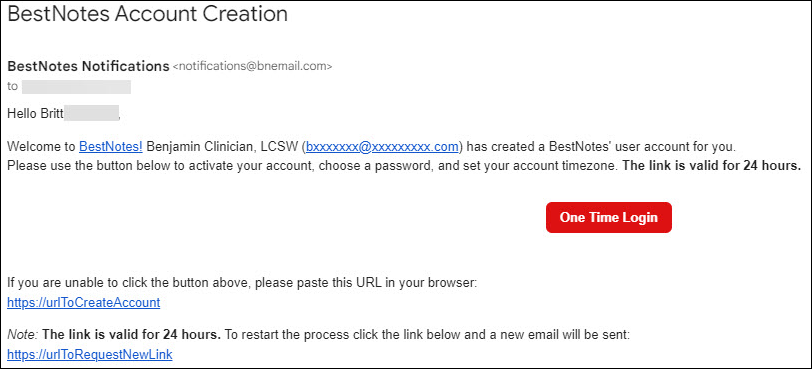
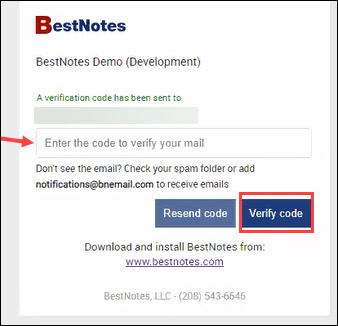
- A new browser window will open, and it will generate another email with a verification code.

- Enter the code from the email into the browser window, and select "Verify code."
- Once verified, you will see an "Identity verified successfully" message. Select, "OK."

- Your account information will now be displayed. Set your password and select your time zone.
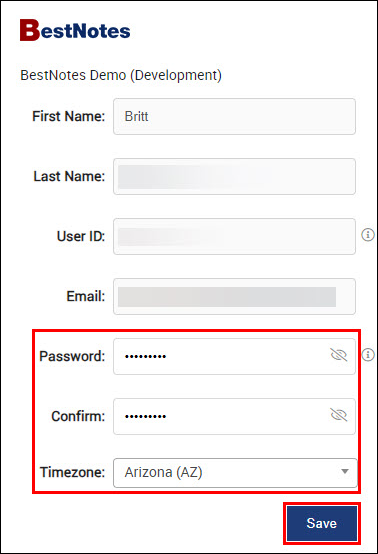
- You will see an "Account Created Successfully" message, select "OK."

- Your BestNotes connection details will display. Save them in a secure location. If you need this information later, you will need to contact your on-site System Administrator. Select the link at the bottom of the page to download and install BestNotes.

Pricing
Creating a new user will result in charges being applied to your BestNotes invoice. For detailed pricing information, please visit https://www.bestnotes.com/pricing.
Back to top of page