This article provides instructions on how to create and edit templates in BestNotes, covering required permissions, navigation to the template editor, and managing template settings like AutoNotes and group restrictions.
Permissions Required
- Manage Templates
Visual Tutorial
Creating and Editing Templates
Navigation
- From your Single Day Dashboard, click on Settings in the bottom left hand corner of the screen.

- Once in the Settings screen, click on the Templates button. This will bring up the Template Editor.
Creating / Editing Templates
With the Template Editor open, the user can now view the list of templates in BestNotes.
To edit a template:
- Click the template title in the selection pane found in the upper right hand corner.

- Click the edit button found below the template selection pane.
To create a new template:
- Click Create New Template. This will open a blank untitled template.
- Add a title in the blank field in the upper right hand corner of the screen.
The selected template now appears in the main editing pane on the left side of the template editor. With the selected template open, the user can begin editing.
The template editor has some of the same basic functionality as any word processing program. The user has the ability to select text size and make text bold, italicized, or underlined. Text can be aligned to the right, left, or center. The user can add bullets or numbers and create indents. Tables and horizontal lines can be added as well.
A template provides the structure for a document by assigning the location where key text and their corresponding AutoNote™ collections will appear.
After typing in the outline of the template, begin adding AutoNote™ collections. There are two scenarios associated with adding an AutoNote™ collection to a template. The first is creating and adding an AutoNote™ collection to the template the second is adding an AutoNote™ collection that already exists to the template.
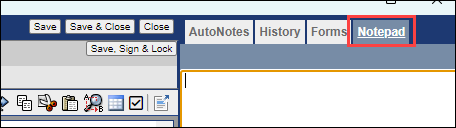
BestNotes Notepad Button (available on a contact's page - Top Right)


Notepad
Active Template in an Activity Log Note - NotePad
Groups
You can restrict a template to a group on the right.
Next Steps
- See also: Creating a Table within a Template
- Learn more about AutoNotes