This article explains how to upload, email, and delete documents associated with a contact in BestNotes, ensuring HIPAA compliance and proper file management.
Permissions Required
Contact your BestNotes System Administrator to ensure you have the necessary user permissions:
- Files
- Delete Folders and Files
- Upload Files
Visual Tutorial
Click the Play button to watch a video tutorial on managing contact documents.
Managing Contact Documents
Documents uploaded to BestNotes are HIPAA compliant because they are stored and accessed with end-to-end encryption.
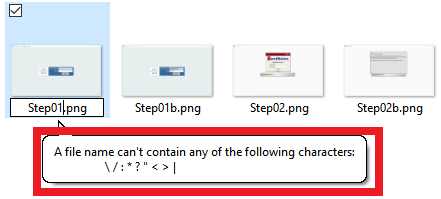
When uploading or downloading files between Mac and Windows, avoid using the following characters in file names:
For more information on characters Apple (Mac) will not accept, Click HERE.
Upload Files
Files must be 50MB or less in size. We recommend scanners be set to 150 dpi / greyscale to prevent creating large file sizes.
To attach a file:
- Go to the specific contact's screen (profile page).
- Click on the Files tab. If folders have been created, open the folder the file should be stored in by double clicking the folder name.
- Click on the Upload File icon (black up arrow on bracket) in the upper right corner.

- Click Browse and select the file to be uploaded. Ensure the file name describes its content for clarity in BestNotes.
- Click Add to Folder. The file will also appear in the chronological activity log based on the upload date.
- Restrict the file's visibility to specific groups within the organization.
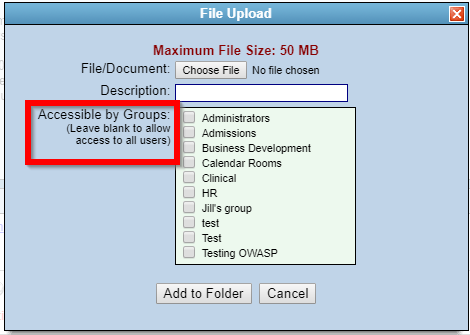
NOTE: The file can be no larger than 50MB in size. Any file larger than 50MB will remain uploading indefinitely.
Emailing a Contact a File
To email a file stored in a contact:
- Go to the contact's screen.
- Click on the Files tab.
- Click once on the file to highlight it (to select multiple files, hold down the Control key while clicking on the files).
- Click on the Email File icon (envelope) in the upper right.
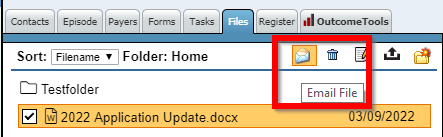
- The default email client will open and compose an email with link(s) to the file(s).
- Enter the address and send.
BestNotes recommends that your business creates a security protocol for a user to have this permission.
Deleting Files
To delete a file:
- Go to the contact's screen.
- Click on the Files tab.
- Click once on the file to highlight it.
- Click on the Delete Document icon (trash can) in the upper right.
- Click OK to delete the selected file.
- Refresh the activity log on the right to see the file disappear from the activity log.
Next Steps
- See also: Upload Documents, Files, PDFs, Video