This article explains how to manage appointment statuses in BestNotes, including using status buttons on the calendar and contact's activity log, understanding the Appointment Details dialog, and interpreting the Appointment Status report.
Permissions Required
No specific BestNotes permissions are required.
Managing Appointment Statuses
NOTE: Statuses only change a single appointment. Use the Delete button OR change the appointment settings to affect all other future recurring appointments.

Each new sub-status can be applied to the appointment through the Appointment Details dialog or through the context menu or on the Contact's Activity Log.
Right Mouse Button (Mac: Command+Click) Examples


Appointment Details Dialog Status Buttons
The status buttons inside the Appointment Details dialog have a streamlined workflow. Any button that will trigger a reverse action regarding that calendar appointment turns red.


There are several optional sub-statuses that can be applied to appointments. Modifying one of the sub-status options (Confirmed, Paid, Ready, Arrived, etc.) from the Appointment Details dialog will not close the dialog window.
Confirm Status
- Confirm– To indicate that appointment notification was accepted.
- Click on an individual contact's confirm (star) button in the Appointment window.
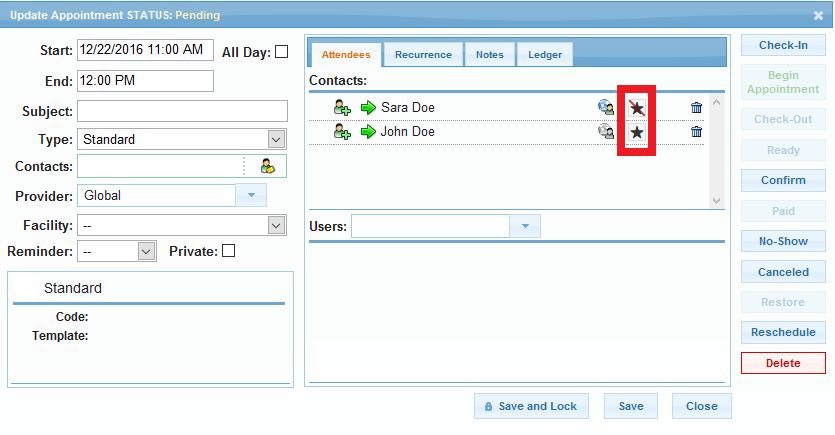
- Click on an individual contact's confirm (star) button in the Appointment window.
- Confirm Continued
- When you click the appointment's Confirm button, you will be prompted to confirm for all contacts.
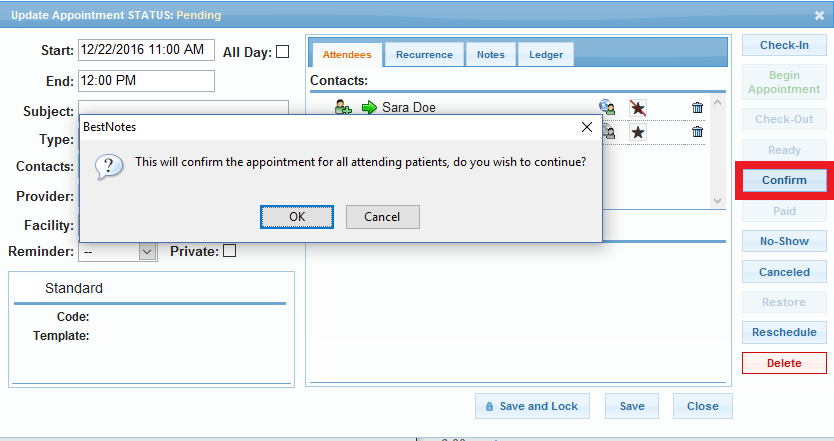
- When you click the appointment's Confirm button, you will be prompted to confirm for all contacts.
- Confirm Continued
- The Status of an appointment will display if some or all contacts have confirmed the appointment.
- Right-Click on the appointment and confirm All Contacts in the appointment.
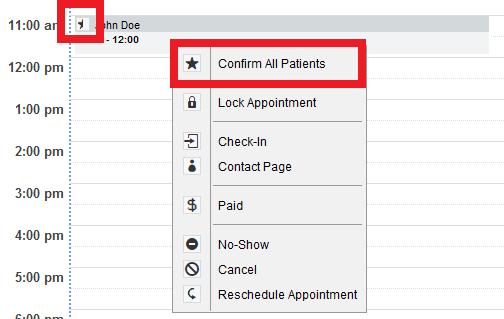
- Confirm Continued
- Confirm each individual contact in an appointment on a contact's Activity Log (chart).
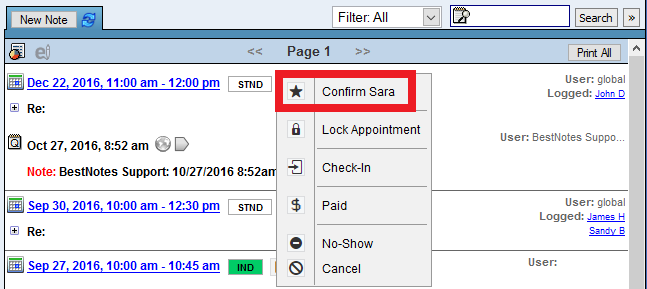
- Confirm each individual contact in an appointment on a contact's Activity Log (chart).
Paid Status
- Paid – Can be used to indicate that the patient's portion of any payment due has been taken care of – can be indicated at any time, even prior to Check-In if a patient has chosen to pay for an appointment in advance.
Appointment Status Report
Displays appointments by appointment day and time.
- It can be filtered by appointment date, provider, and primary contact location. It can further be filtered for specific appointment types (multiple appointment types can be selected at once) and appointment status (not checked in, not checked out, checked out, no show, canceled, or all).
- Fields displayed: appointment type, primary contact, primary contact phone, primary contact email, provider, appointment date, appointment time (start and end), appointment length, title, notes, status, confirmed, arrived, paid, and locked.
- Ledger information
Examples:
- Managing appointment confirmations for future appointment days.
- Reviewing a number of 'no shows' during a particular date range or by provider.
- Monitoring payments collected by appointment date.
- Check multiple appointments for confirmations (see confirmation column).
Notes on Unlocking Group Notes
NOTES:
- Unlocking Group Notes removes all signatures and the Group Note from all the participants' Activity Logs. All the Signers will need to re-sign the Group Note.
- This should NOT be done if the Group Note was created by an Appointment.
- Consider a separate Appointment and Group Note.
- Otherwise:
- The appointment will need to be Unchecked-In (NOTE: Deletes all participants Notes and Voids Ledgers).
- The client added.
- The Appointment re-Checked-In by Provider (opens Group Note).
- The Group Note will have to be recreated from scratch for each participant.
- Locked and All signers resign.
Next Steps
- For more documentation and reports, click HERE.