This article explains how to create telehealth appointments in BestNotes from the calendar and send meeting information to participants.
Permissions Required
No specific BestNotes permissions are required.
Creating and Managing Telehealth Appointments
Create a Telehealth Appointment
If you don't have the ability to create a telehealth appointment, reach out to your system administrator. If you are the system administrator, you can find more information in the Telehealth setup article.
- Create an appointment in the calendar.
- Fill out the appointment details as you would for any other appointment.
- When selecting the appointment "Type", you may have "Telehealth Appointments" to choose from. This will automatically select the "Telehealth Session" checkbox when selected.
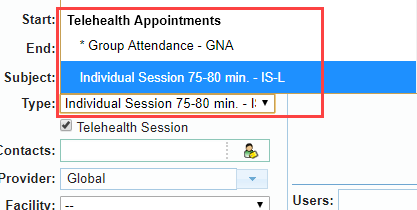
- To make any other appointment type a telehealth appointment, select the "Telehealth Session" checkbox.

- Select "Save."
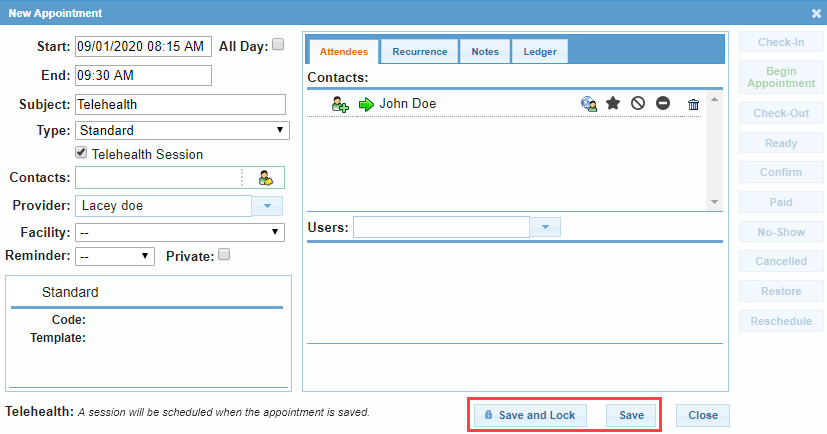
If you have opted-in for the email notification to be sent automatically, it will be sent upon save. If you have not, you must manually send the meeting information to the participants. This is explained in the next section.
If you are using a recurring meeting, and you are also utilizing the automatic email notifications, your participants will receive an email for the first occurrence of the appointment only. If you add a new participant to this appointment at a later date, the new participant will receive an email notification for the appointment they were added to, but it will not send the email notification to the existing participants at this time.
Send Meeting Information
Once you have saved the appointment, you can email the meeting information to the client and other logged users by following these steps.
- Open appointment.
- Select the paper airplane icon.
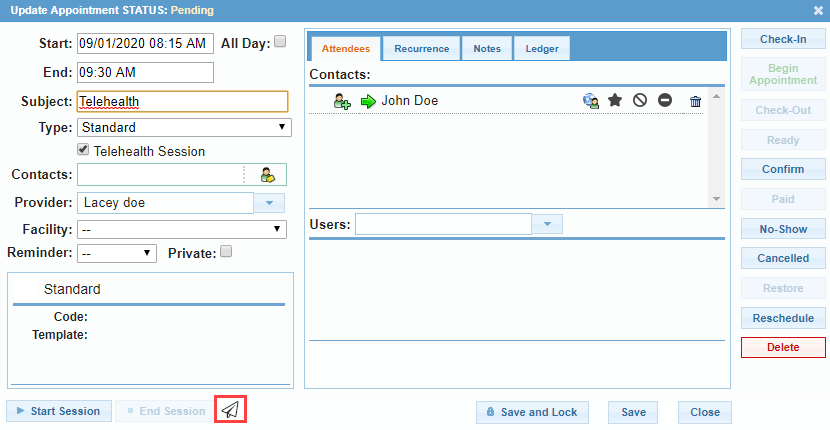
- To verify the client or user has a valid email address, hover over their name to see the email.

- Select which contacts you want to send the invitation to.
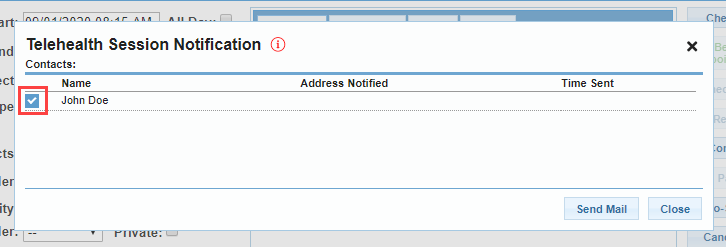
- Select "Send Mail."

- You will then receive a message verifying the email was sent. Select "Okay."
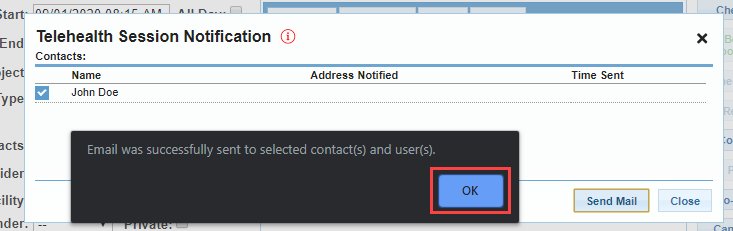
- Select "Save."

Once you have created your telehealth appointment, there are a few things within that appointment that you should be aware of. If an existing telehealth appointment is cancelled, this will disable the "Start Session" button.

Once you select the "Start Session" button, you will no longer have the option to cancel, reschedule, or delete that appointment.

Now that your appointment has been saved, and your notifications have been sent, you have successfully created a telehealth appointment.