This article explains how to create, edit, and delete custom tests in BestNotes, which can be used to record in-office test results and manually enter lab results for import into various client records.
Permissions Required
- Manage Custom Tests
- View Custom Tests
- Edit Custom Tests
Creating and Managing Custom Tests
Before you create your custom tests, you will need to submit a ticket to submit a support ticket to have them activate the "Custom Tests" tab in your Med/Clinical. If you do not have this activated, you will not see the custom tests that you create in your Med/Clinical tab.
Create Custom Tests
When you are logged into BestNotes, follow these steps to view, create, and update your custom tests.
- Navigate to the "Settings" area on the bottom left navigation bar.
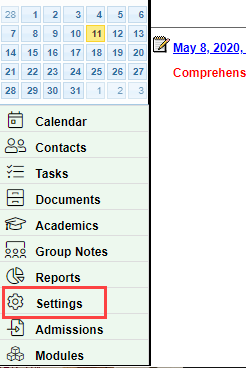
- Navigate to the "Custom Tests" area.

- Select the "Custom Tests" tab.
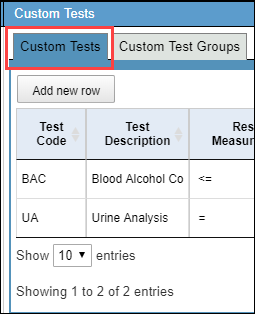
From this area, you can view and edit any existing tests, and create new tests.
Create a New Test
- Select "Add new row."

- Fill in the desired areas.
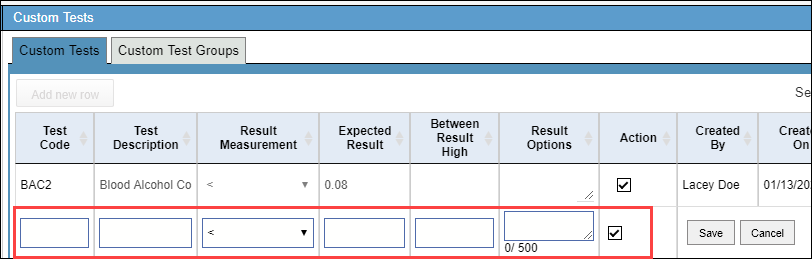
- Select "Save."

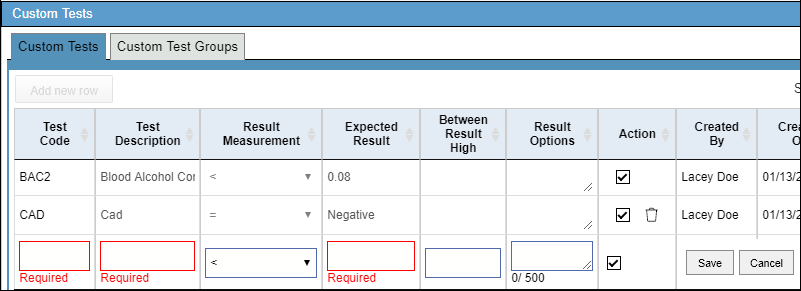
You will need to fill out all of the required fields, and any other fields necessary for your test result. The fields marked with an asterisk are required, and are defined as follows:
- *Test Code: this is the short name of the test, and this needs to not have any spaces.
- *Test Description: this is the description of the test.
- Result Measurement: this is a measurement of the result, and a drop-down selection option.
- *Expected Result: this is the expected outcome.
- Between Result High: if your result needs to fall between two expectations, this is your highest expected result.
- Result Options: if you would like the result to be specific options every time, place the options here with a vertical pipe separating each option.
- Action: This must be selected to make the test active in the med/clinical, and can be unselected to inactivate the test. If there is a trash can symbol available, this means the test can be deleted.
Edit an Existing Test
Locate the test you would like to update, and click the area within that line that you would like to update. The areas that can be adjusted are as follows:
- Test Description
- Result Measurement
- Expected Result
- Between Result High
- Result Options
- Action
All other areas are not editable.

Once you have completed setting up the custom tests, you will need to update your permissions, and the permissions of any additional users that will need to view and edit the test results.

Delete Tests
In order to delete a test, that test must not be applied to a client. If the test has not been applied to the client, you will see a trash can symbol in the row of the test. Select the trash can to delete the test.
