This guide outlines the sequence of reports to run and review as part of your billing workflow, including their purpose, key details to check, and instructions for accurate and timely claim processing.
Permissions Required
- Reports
- Create Claims
- View Claims
- Edit Claims
- Release Claims
Billing Workflow for CMS-1500 (HCFA)
Calendar Appointment and Documentation Review
- Navigate to and select the Reports tab.
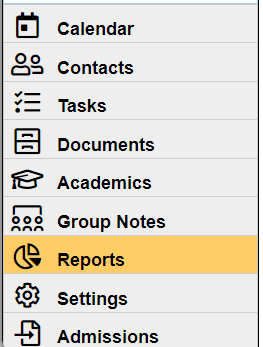
- Select the Report Type dropdown.

- Select C - Appointment Status.
Purpose: Displays the details and statuses of all calendar appointments within the filter criteria.
What to check:
- Make sure all appointments you're preparing to bill for are Checked Out.
- Review the "Log" column to verify documentation was generated from the users' calendar appointment.
Only appointments Checked Out will create a ledger entry for you to bill.
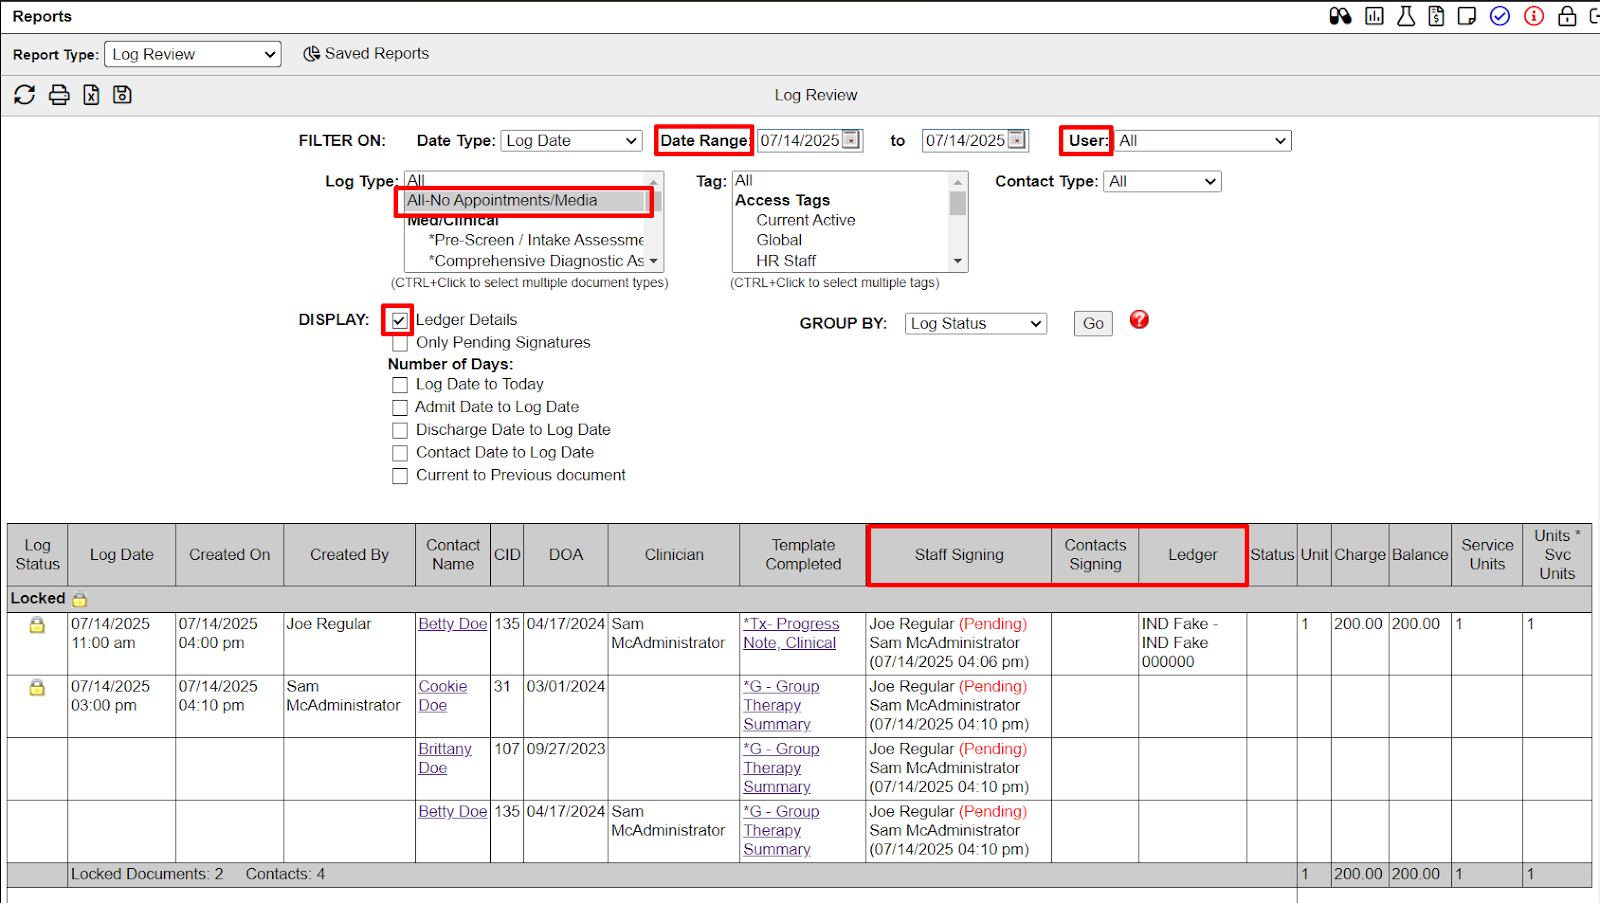
Select Log Review.
Purpose: Shows whether documents are locked and signed by all required signers.
What to check:
- The document status (Locked or Unlocked)
- That all required signers have signed
- Select the linked "Template Completed" to review a specific document
- Ledger codes are correct
Insurance Claim Review
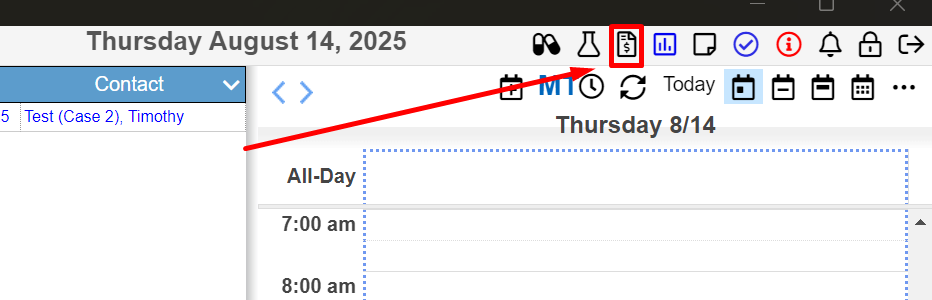
- Navigate to and select the Claims Manager icon.
- Go to the "Reports" section to continue.
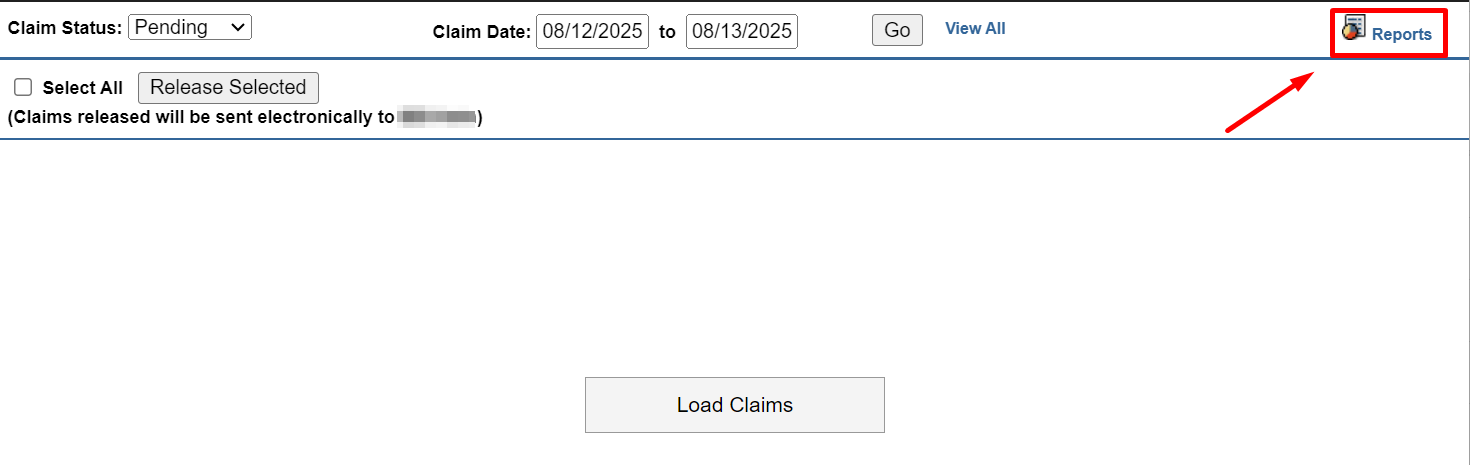
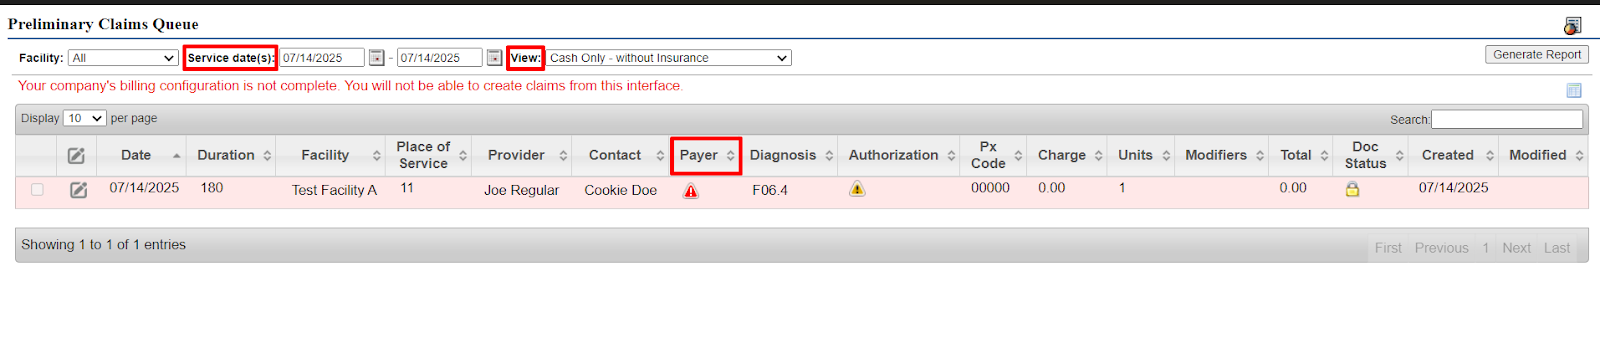
Review both Cash Only reports
Cash Only - without insurance
Purpose: Identifies clients who do not have insurance on file.
How to fix:
- Go to the client's chart
- Select the "Payers" tab, unselect the "Cash Only", select "Add Payer"
- Enter the client's insurance information.
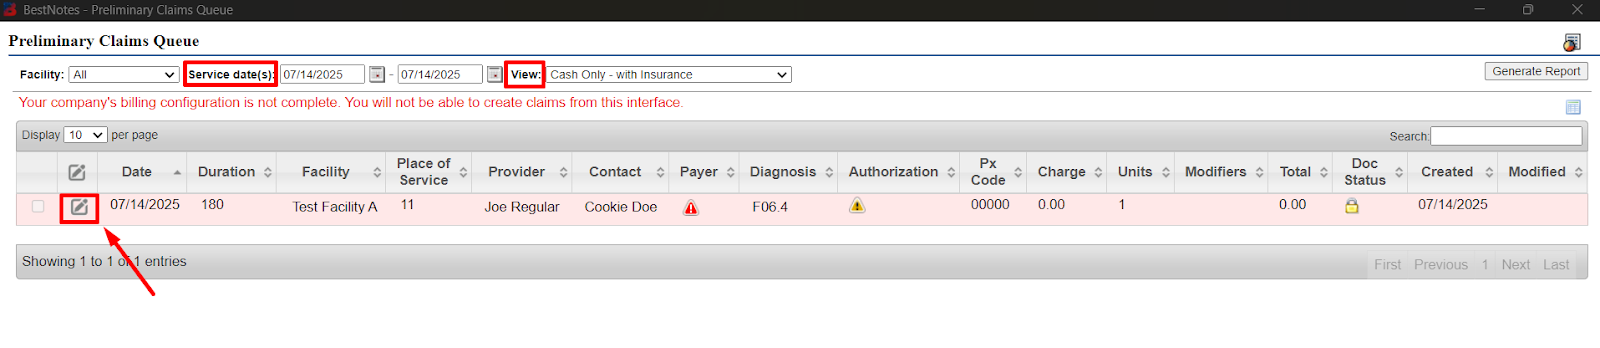
Cash Only - with insurance
Purpose: Identifies clients who have insurance, but didn't at the time of service.
How to fix:
- Select the "Edit" icon
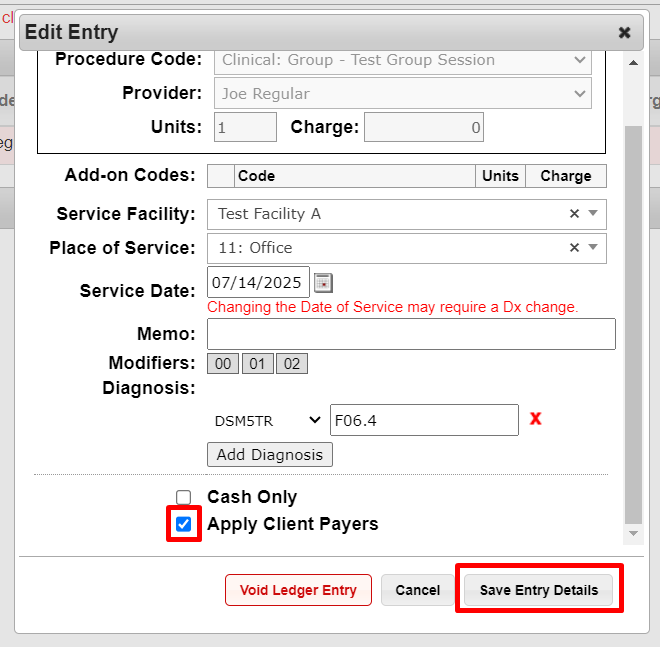
- Unselect the "Cash Only" checkbox
- Select the "Apply Client Payers" to link the insurance to the past service.
- Select "Save Entry Details"
The claim will disappear from this report and display in the Preliminary Claims report
Process preliminary claims
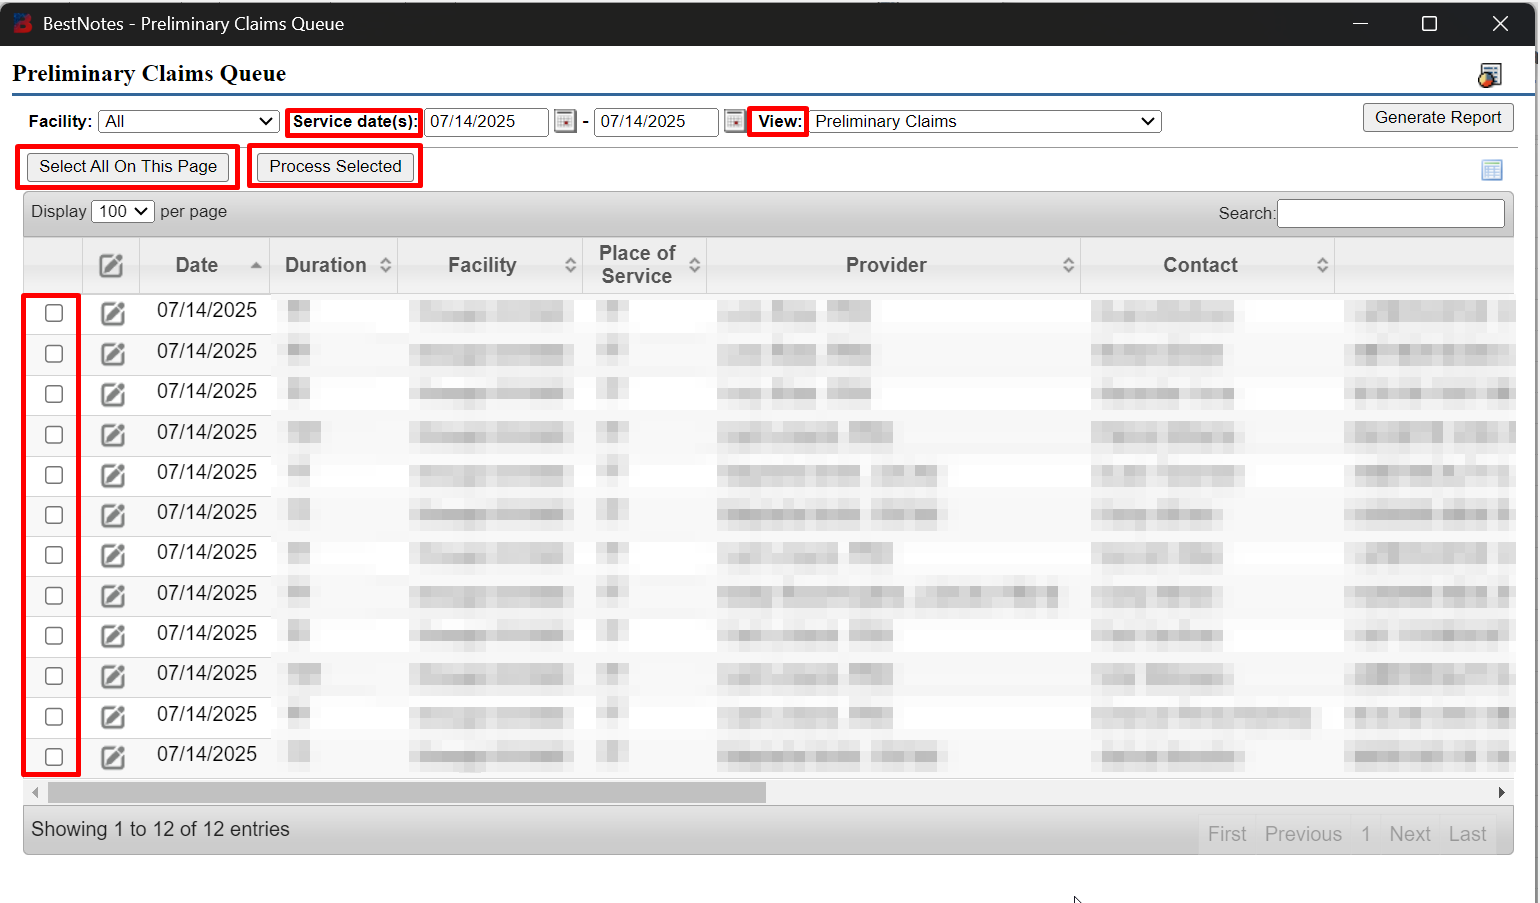
Purpose: Claims ready for review and release.
How to process:
- Choose the date range
- Review and fix any missing or incorrect information
- Use "Select All On This Page" or choose individual claims
- Select "Process Selected"
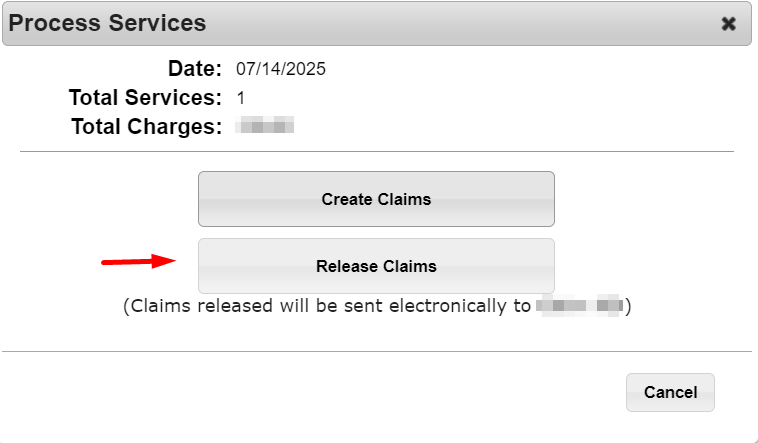
- In the Process Services window:
- Select "Create Claims" to move the selected claims to the pending status within the Claims Manager window
- Select "Release Claims" to send the selected claims to your billing software
- Navigate to and select the Reports tab.
- Select the Report Type dropdown.
- Select "Billing Report".
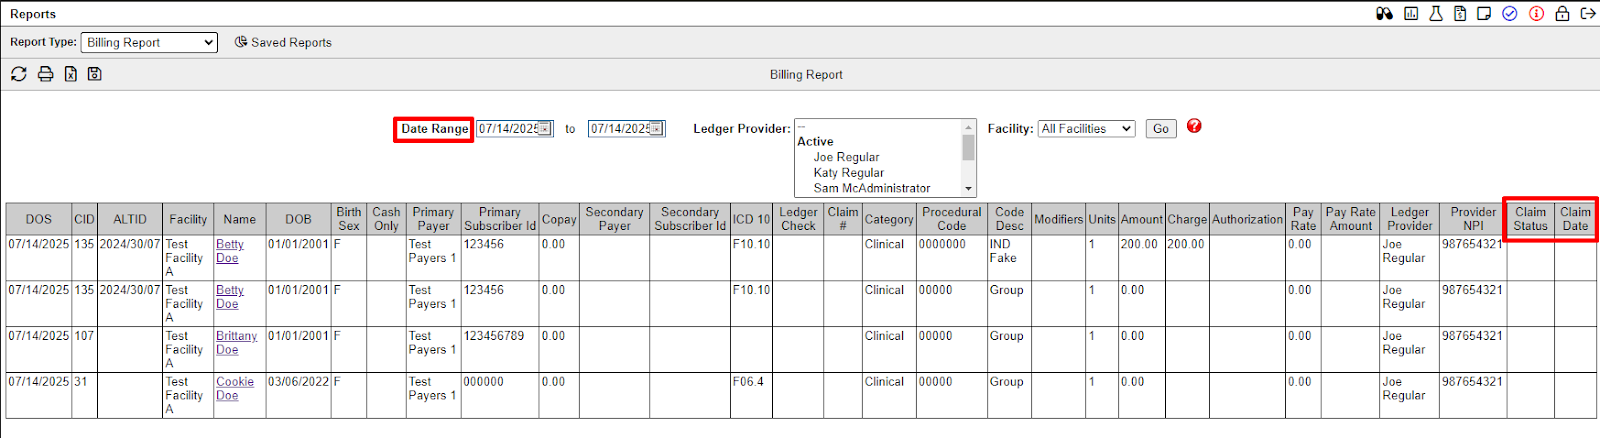
Purpose: Displays all client details related to ledger details and claim statuses.
What to check:
- Delivered status - the claim was released from BestNotes to the billing software
- Pending status - the claim hasn't been released to the billing software and can be released from the claims manager
- Claim dates - the date of the claim status
- Overall billing progress within BestNotes
- Select the Report Type dropdown.
- Select "Register/Ledger".
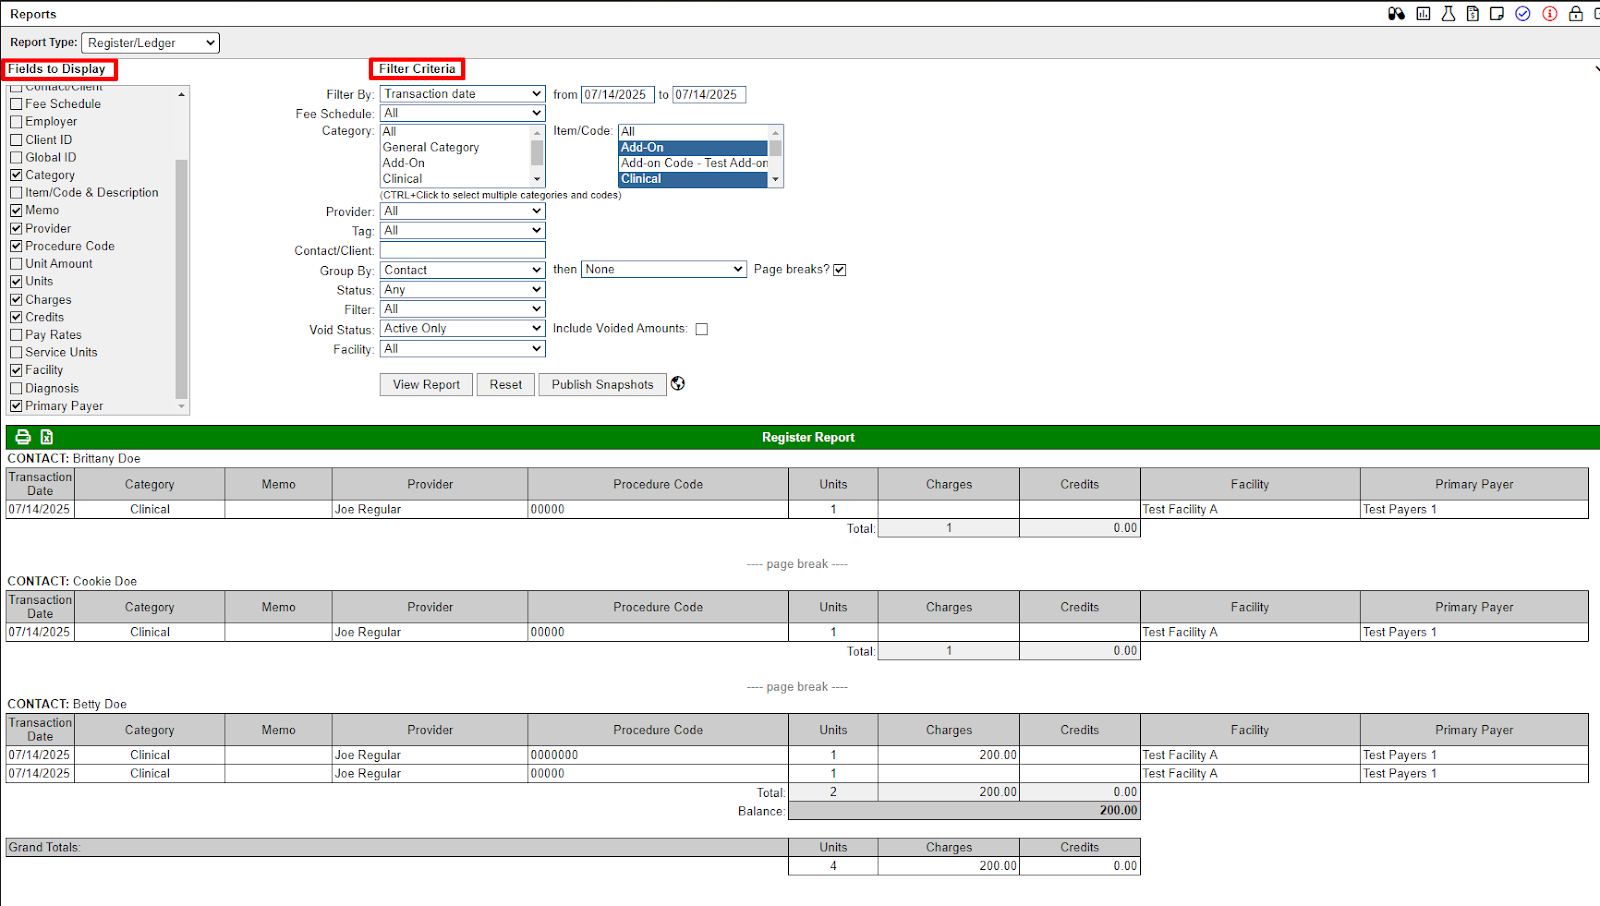
Purpose: Displays all ledger activity within the filter criteria.
How to use:
- Add all fields you would like to display for each row of data
- Filter by date, client, or other criteria