This article details new Patient Portal and Application Manager features, including a Custom Document Request system for applicants to upload required files and automated tagging for intake applications upon import.
Permissions Required
- Manage Admissions
Managing Patient Portal Features
Configuring Custom Document Requests (Staff)
Admissions staff can now customize which documents are needed for different application types (e.g., Adult vs. Adolescent).
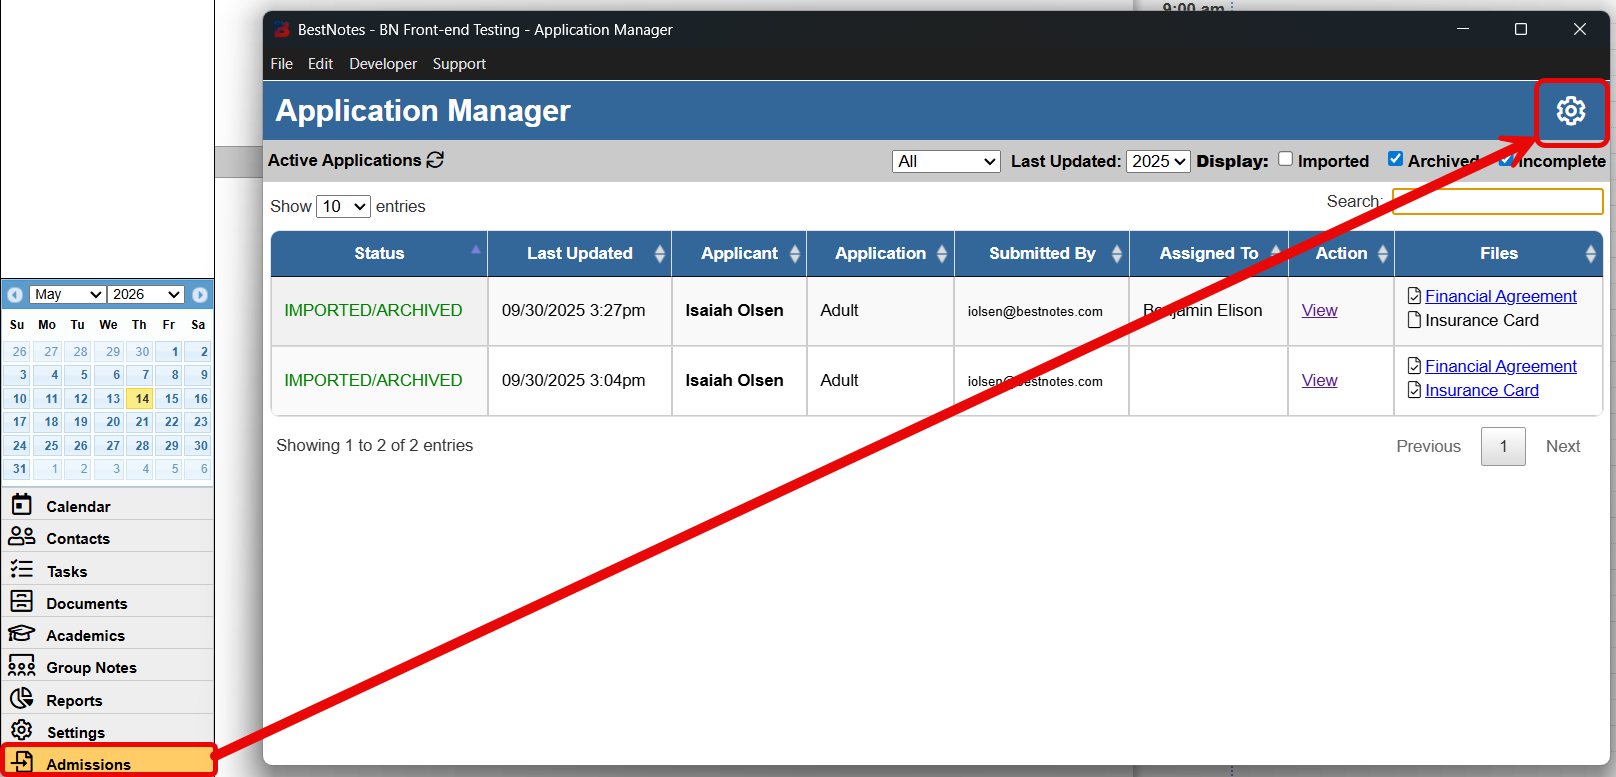
- Click the Admissions button to open the Application Manager. Click on the gear icon to open Application Configuration.
- Locate the application type and click + Add Document Request.
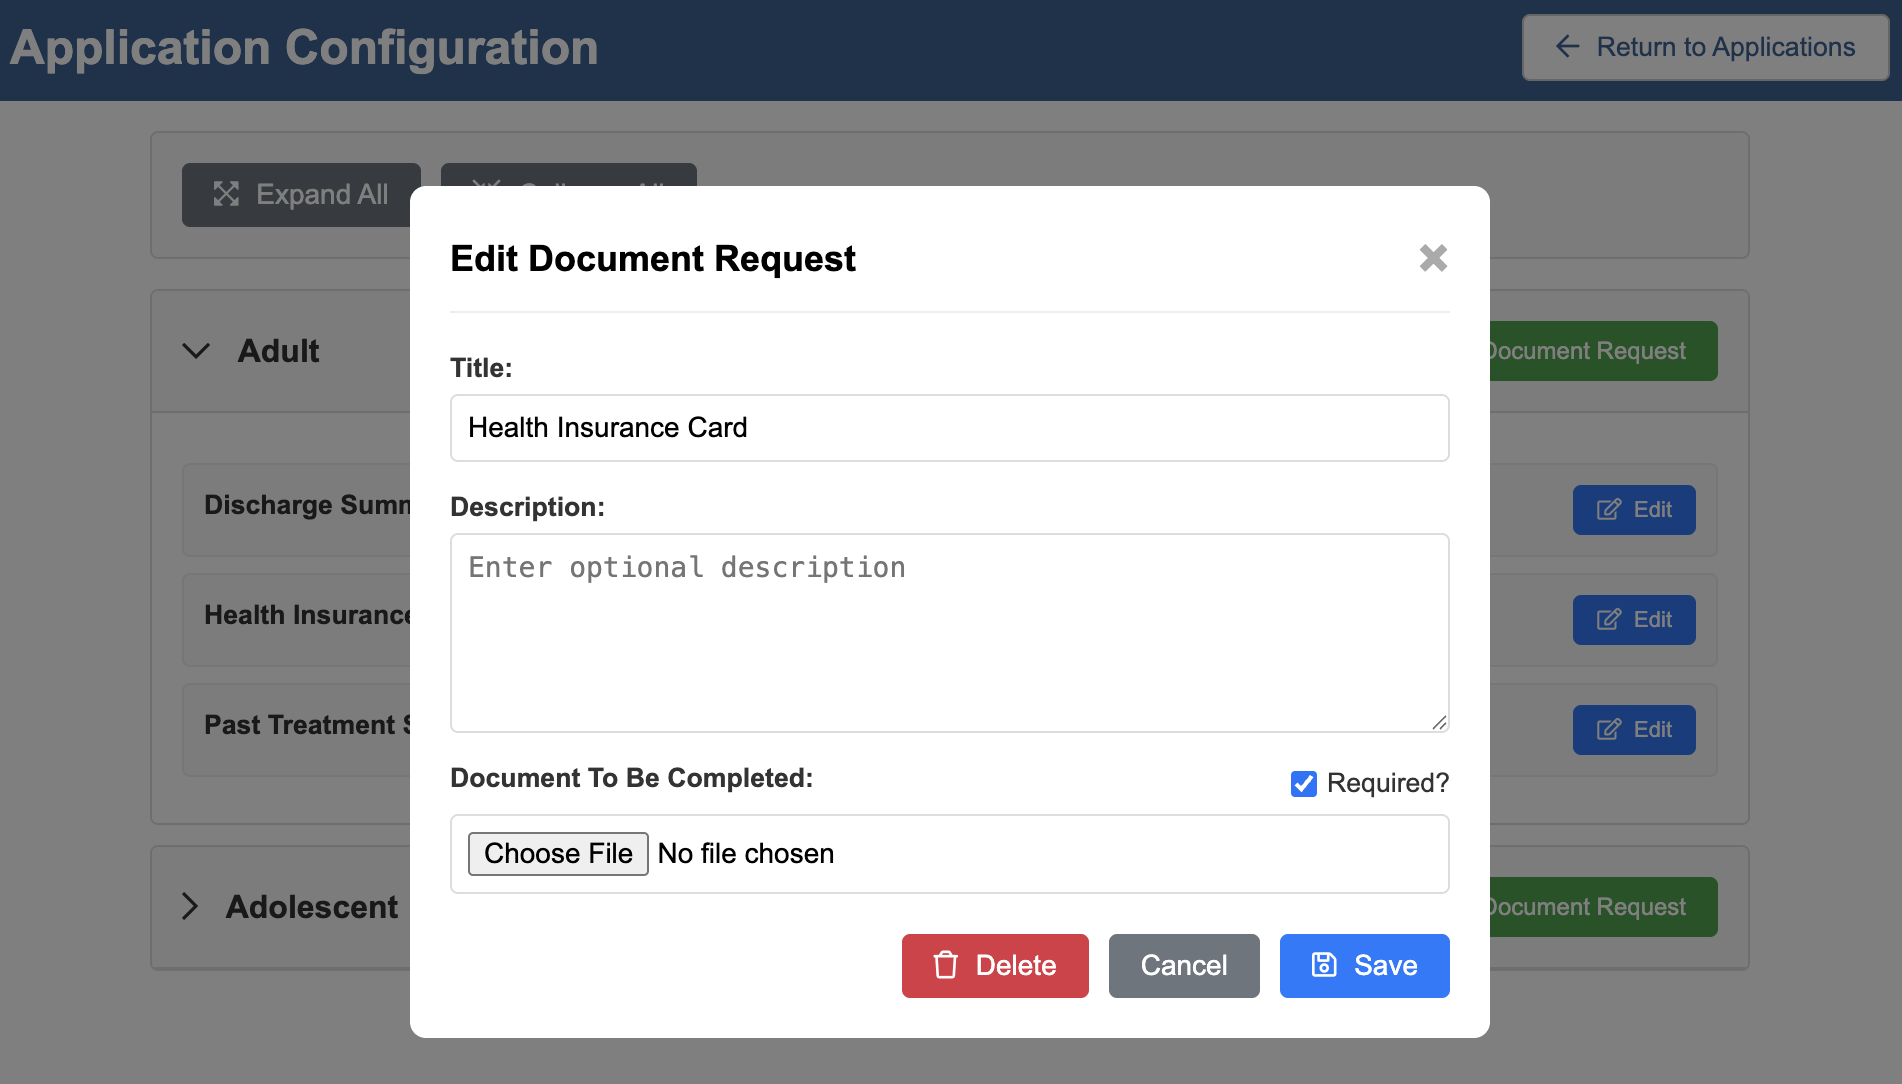
- Enter a title (e.g., "Health Insurance Card") and an optional description.
- Check the Required? box if the application cannot be finalized without this file.
- Click Save. You can also Edit or Delete existing requests at any time.
Uploading Documents (Applicants)
From the applicant’s perspective, the process is seamless:
- On the Portal Dashboard, the applicant will see a status of Incomplete - Pending Uploads until all required files are uploaded.
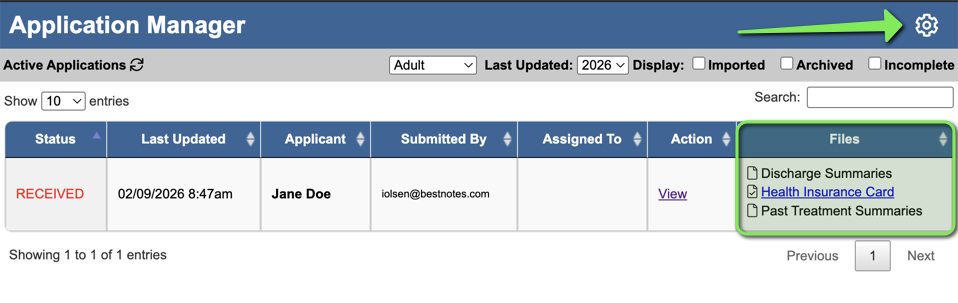
- Clicking either the Supporting Documents or Required Documents button will open the file uploads page.
- On the upload page, they can see which files are Required or Requested if applicable.
- The applicant selects Choose File, picks their document (up to 50MB), and uploads it.
Reviewing Submitted Documents (Staff)
Once uploaded, these files are immediately visible to your team.
- Click the Admissions button to open the Application Manager.
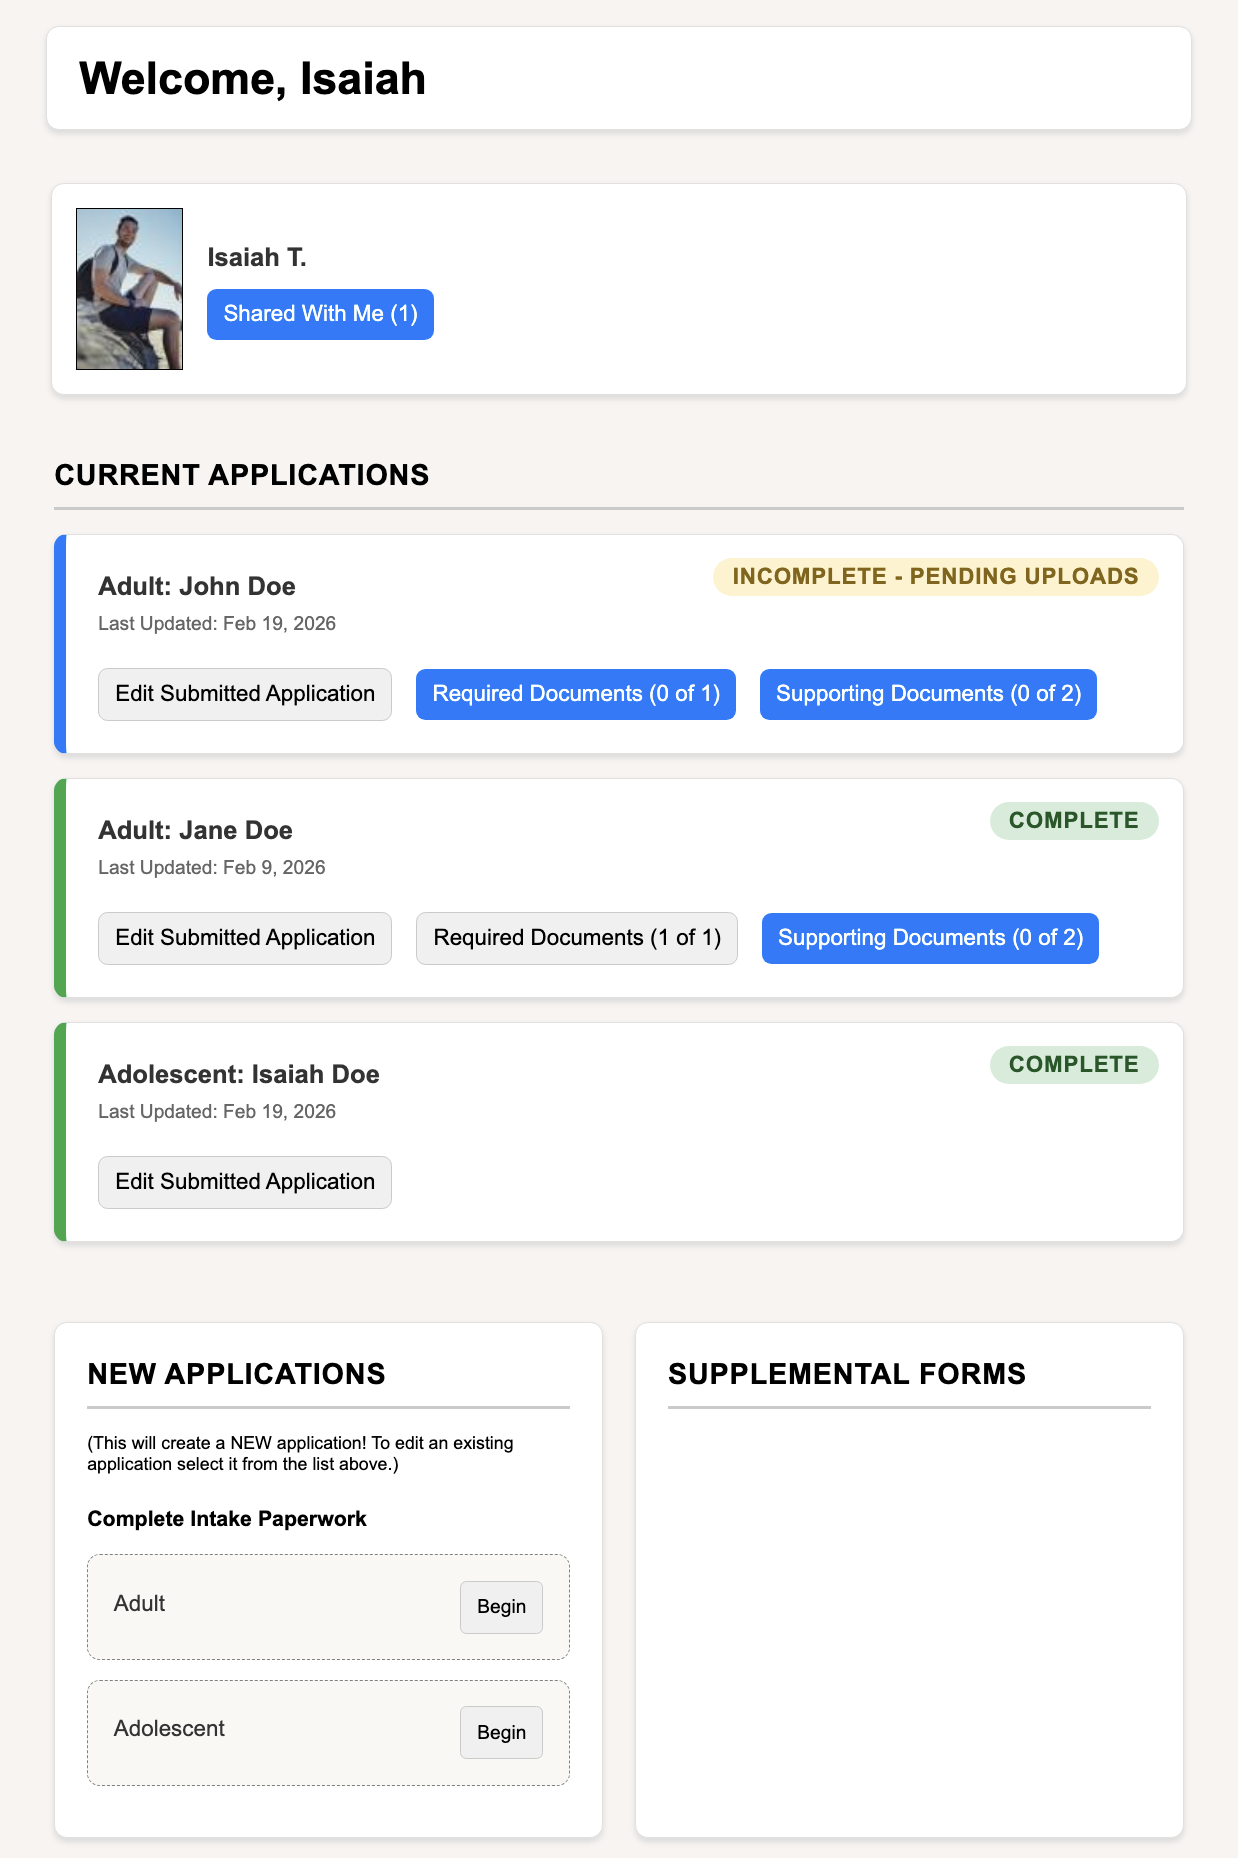
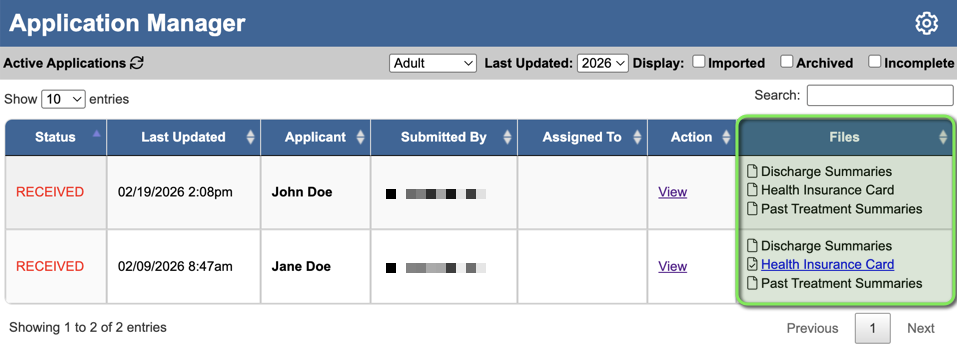
- In the Files column of the Active Applications table, you will see a list of all documents submitted by that applicant.
- Click the document name to view or download the file directly from the table.
- Once an application is imported, the files will be added to an Admission Folder in the client's Files Tab.
Automated Tagging for Intake Applications
We have introduced a new Tags configuration tool within the Application Configuration page. This feature allows System Administrators to pre-define multiple tags that automatically apply to a patient’s chart the moment their application type is imported.
Previously, configuring default tags required a request to BestNotes Support. By moving this into a self-service interface, System Administrators can now:
- Increase Efficiency: Eliminate the manual step of tagging records after an import.
- Improve Data Accuracy: Ensure every patient record is categorized consistently and accurately based on the specific application type.
- Gain Autonomy: Instantly update and manage application workflows without waiting for backend configuration changes.
How to configure your intake application tags:
- Navigate to Admissions and select the Gear Icon.
- Locate the specific Application Category you wish to modify (e.g., "Adult Intake" or "Youth Intake").
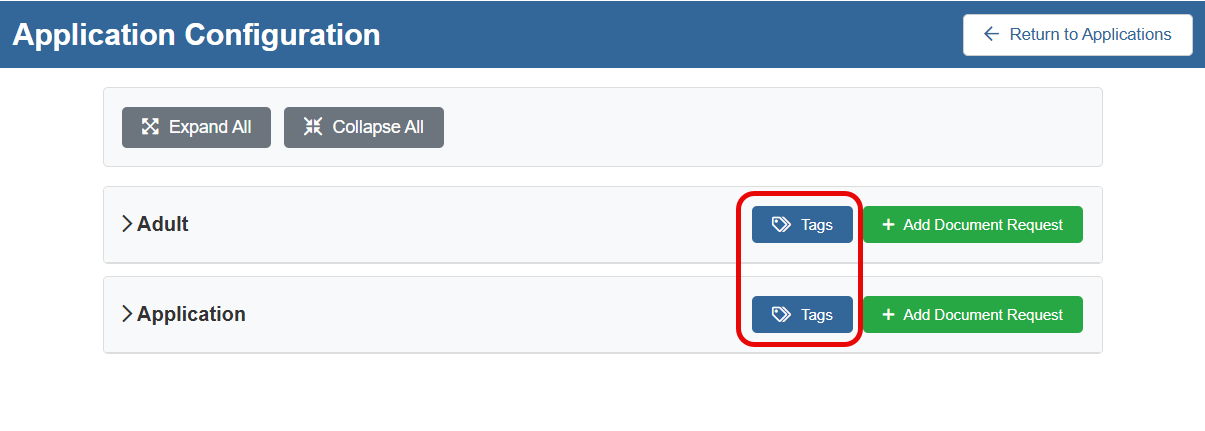
- Click the new Tags button, located next to the + Add Document Request button.
- In the multi-select drop-down menu, select the tags you wish to apply.
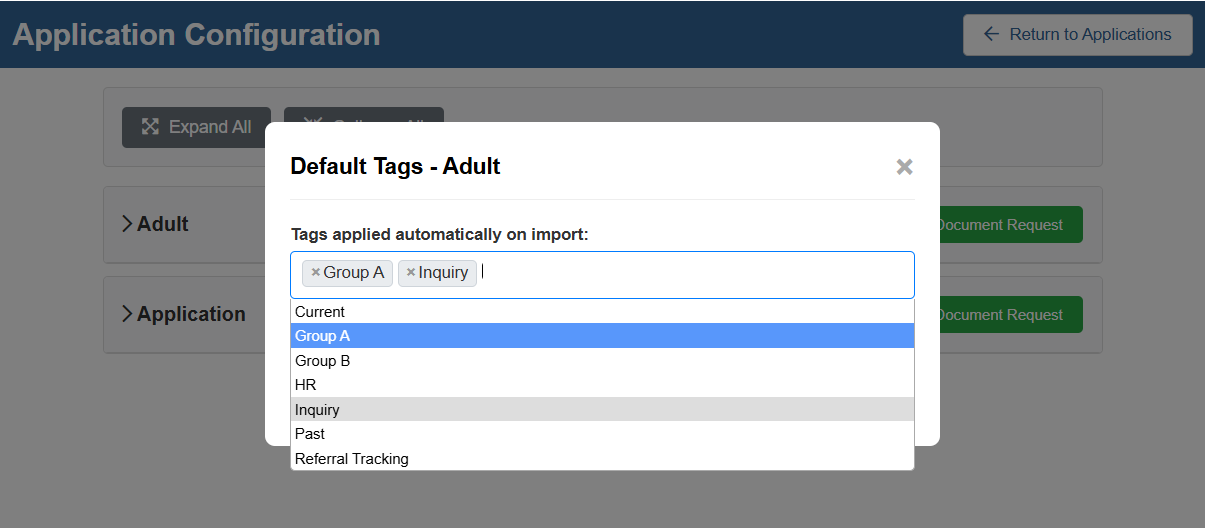
- Click Save.
Note: You can use the search bar within the menu to quickly find specific tags from your existing library.
Once configured, any application imported via the Admissions Manager will automatically include these tags on the newly created or updated patient chart.
Back to top of page