This article provides instructions on how to merge duplicate client contacts in BestNotes when neither contact has a discharge date, covering how to transfer various types of data from the duplicate record to the primary record.
Permissions Required
- File Audit
Merging Duplicate Contacts
For regular database clean-up, run the Duplicate Client Report (Displays clients and their CID number who may have a potential duplicate. Displays possible demographic matches.). Choose one of the two contacts and make sure demographics are correct on the contact you are keeping.
See attached example at the bottom of this page.
NOTE: If a client already has a discharge date, then BestNotes Support recommends creating a second Duplicate Client. For more information, Click HERE.
Go to the contact profile that will be deleted to begin transferring information:
Template Documents on the Activity Log
- Open a document or note. (It will need to be unlocked if it is locked. See File Audit permission).
- In the search box on the right side below the orange bar, search for the contact the document needs to be moved to.
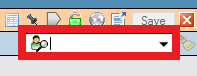
- Click Save.
Med/Clinical Snapshots
- BestNotes Support recommends keeping the second Duplicate Client. For more information, Readmit client and duplicate information.
- For older snapshots that have data not, print to PDF and re-upload them to the correct account.
Online Applications
- Need to be re-entered into the correct Contact through the Admissions window.
Group Notes
- Click the Group Notes button (Dashboard).
- Click the History tab.
- Search for the note needing moved.
- Unlock the note.
- Click the Sessions tab.
- Open the Group Note.
- Add the correct contact as a participant.
- Copy any data from the field below the wrong contact.
- Paste under the correct contact.
- Delete the wrong contact from the Group Note.
- Save & Lock.
Appointments
NOTE: Appointments need to be changed on the actual appointment on the calendar.
Uploaded Files
- Download the files (Double Click).
- Save them to your desktop.
- Click the file once.
- Click the delete icon (if you have the permission).
Finalizing the Merge on the Correct Client Profile
- Open each document (Make sure they are all there).
- Delete the wrong client.
- Lock the documents.
- Upload files on the files tab.
Next Steps
- See also: Readmit client and duplicate information
- See also: Settings & Permissions
- See also: Documents & Files Permissions